Modding the Keychron C2 Wired Mechanical Keyboard
Wednesday, June 2, 2021
Click here to go to all posts.
Modding the Keychron C2 - bandaids, stabilizers, and silicone
The Keychron C2 is a wired, full-size mechanical keyboard. It has soldered and hotswap variants, with multiple kinds of switches and backlighting. Depending on the version you choose, the price (without shipping) ranges from $44 to $69 (as of 2021Q2). It supports both Windows and macOS layouts via a mechanical switch on the back and includes the appropriate keycaps for both.
Basic specs:
- Case: Plastic ABS
- Stabilizers: Plate mount
- Switches: Gateron or Keychron brand, in either soldered or hotswap configuration. Red, Brown, Blue.
- Backlight: None, White, or RGB.
- Product link: Here
Mods
The sound and feel could be improved a bit. The Keychron C2 has a very hollow, plastic case, and comes with plate-mount stabilizers.
I did three mods to this board to start with:
- Re-lubricated the stabilizers
- Bandaid modded the PCB
- Created a silicone dampener
Note: these are just the essentials. I would anticipate folks changing out the switches and keycaps for their preferred variety, once these mods are done.
Rather than creating guides for these individual mods, here are tutorials you can watch to learn more about them:
- Guide to stabilizer tuning: https://youtu.be/usNx1_d0HbQ
- Guide to bandaid modding (starts at 309 seconds): https://youtu.be/cD5Zj-ZgMLA?t=309
- Silicone mod example tutorial (starts at 210 seconds): https://youtu.be/5FynctdZqZw?t=210
The process for the Keychron C2 is straightforward as well. Keychron provides a brief disassembly guide, which can be found here: https://www.keychron.com/pages/how-to-disassemble-c2.
In addition, you will need to remove the switches to get to the stabilizers. This is easier with the hotswap board, but it was not particularly hard with the solder board either.
Once you have the switches and stabilizers removed, you can start the mods.
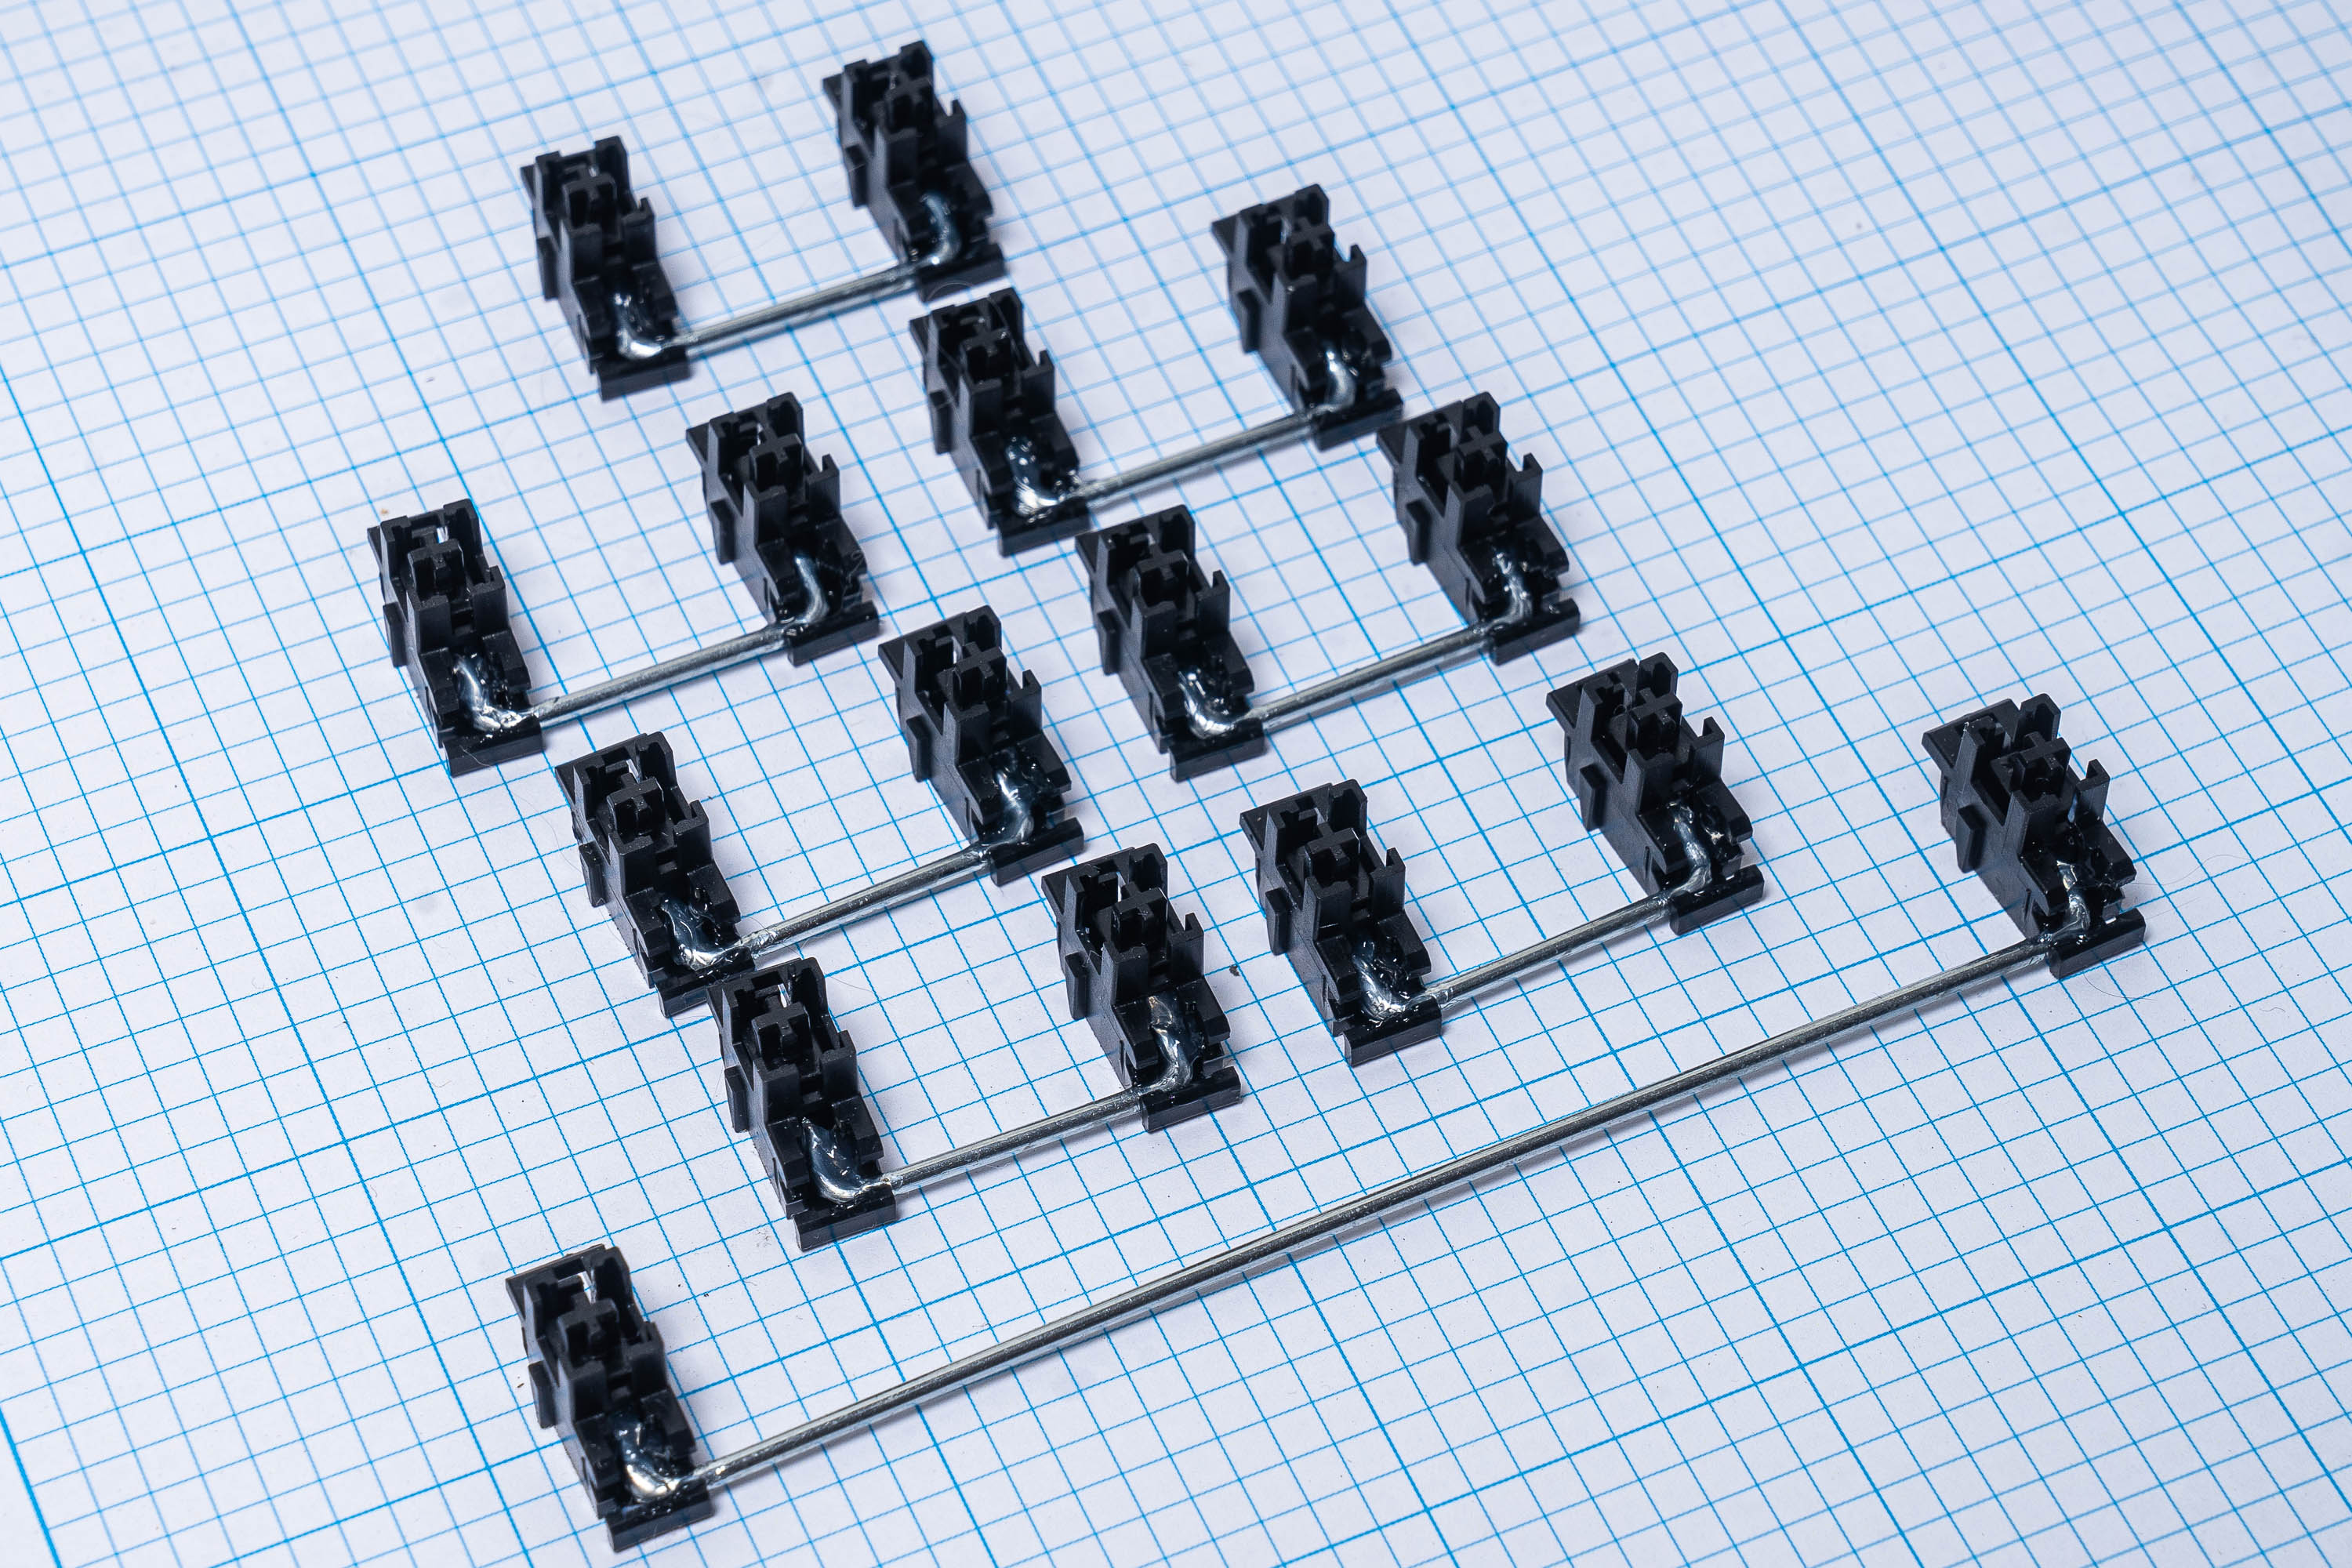
First, you will likely want to clean the stabilizers and re-lubricate them. Common options involve Krytox 205g0 and Permatex dielectric grease. Here are the modded stabilizers:
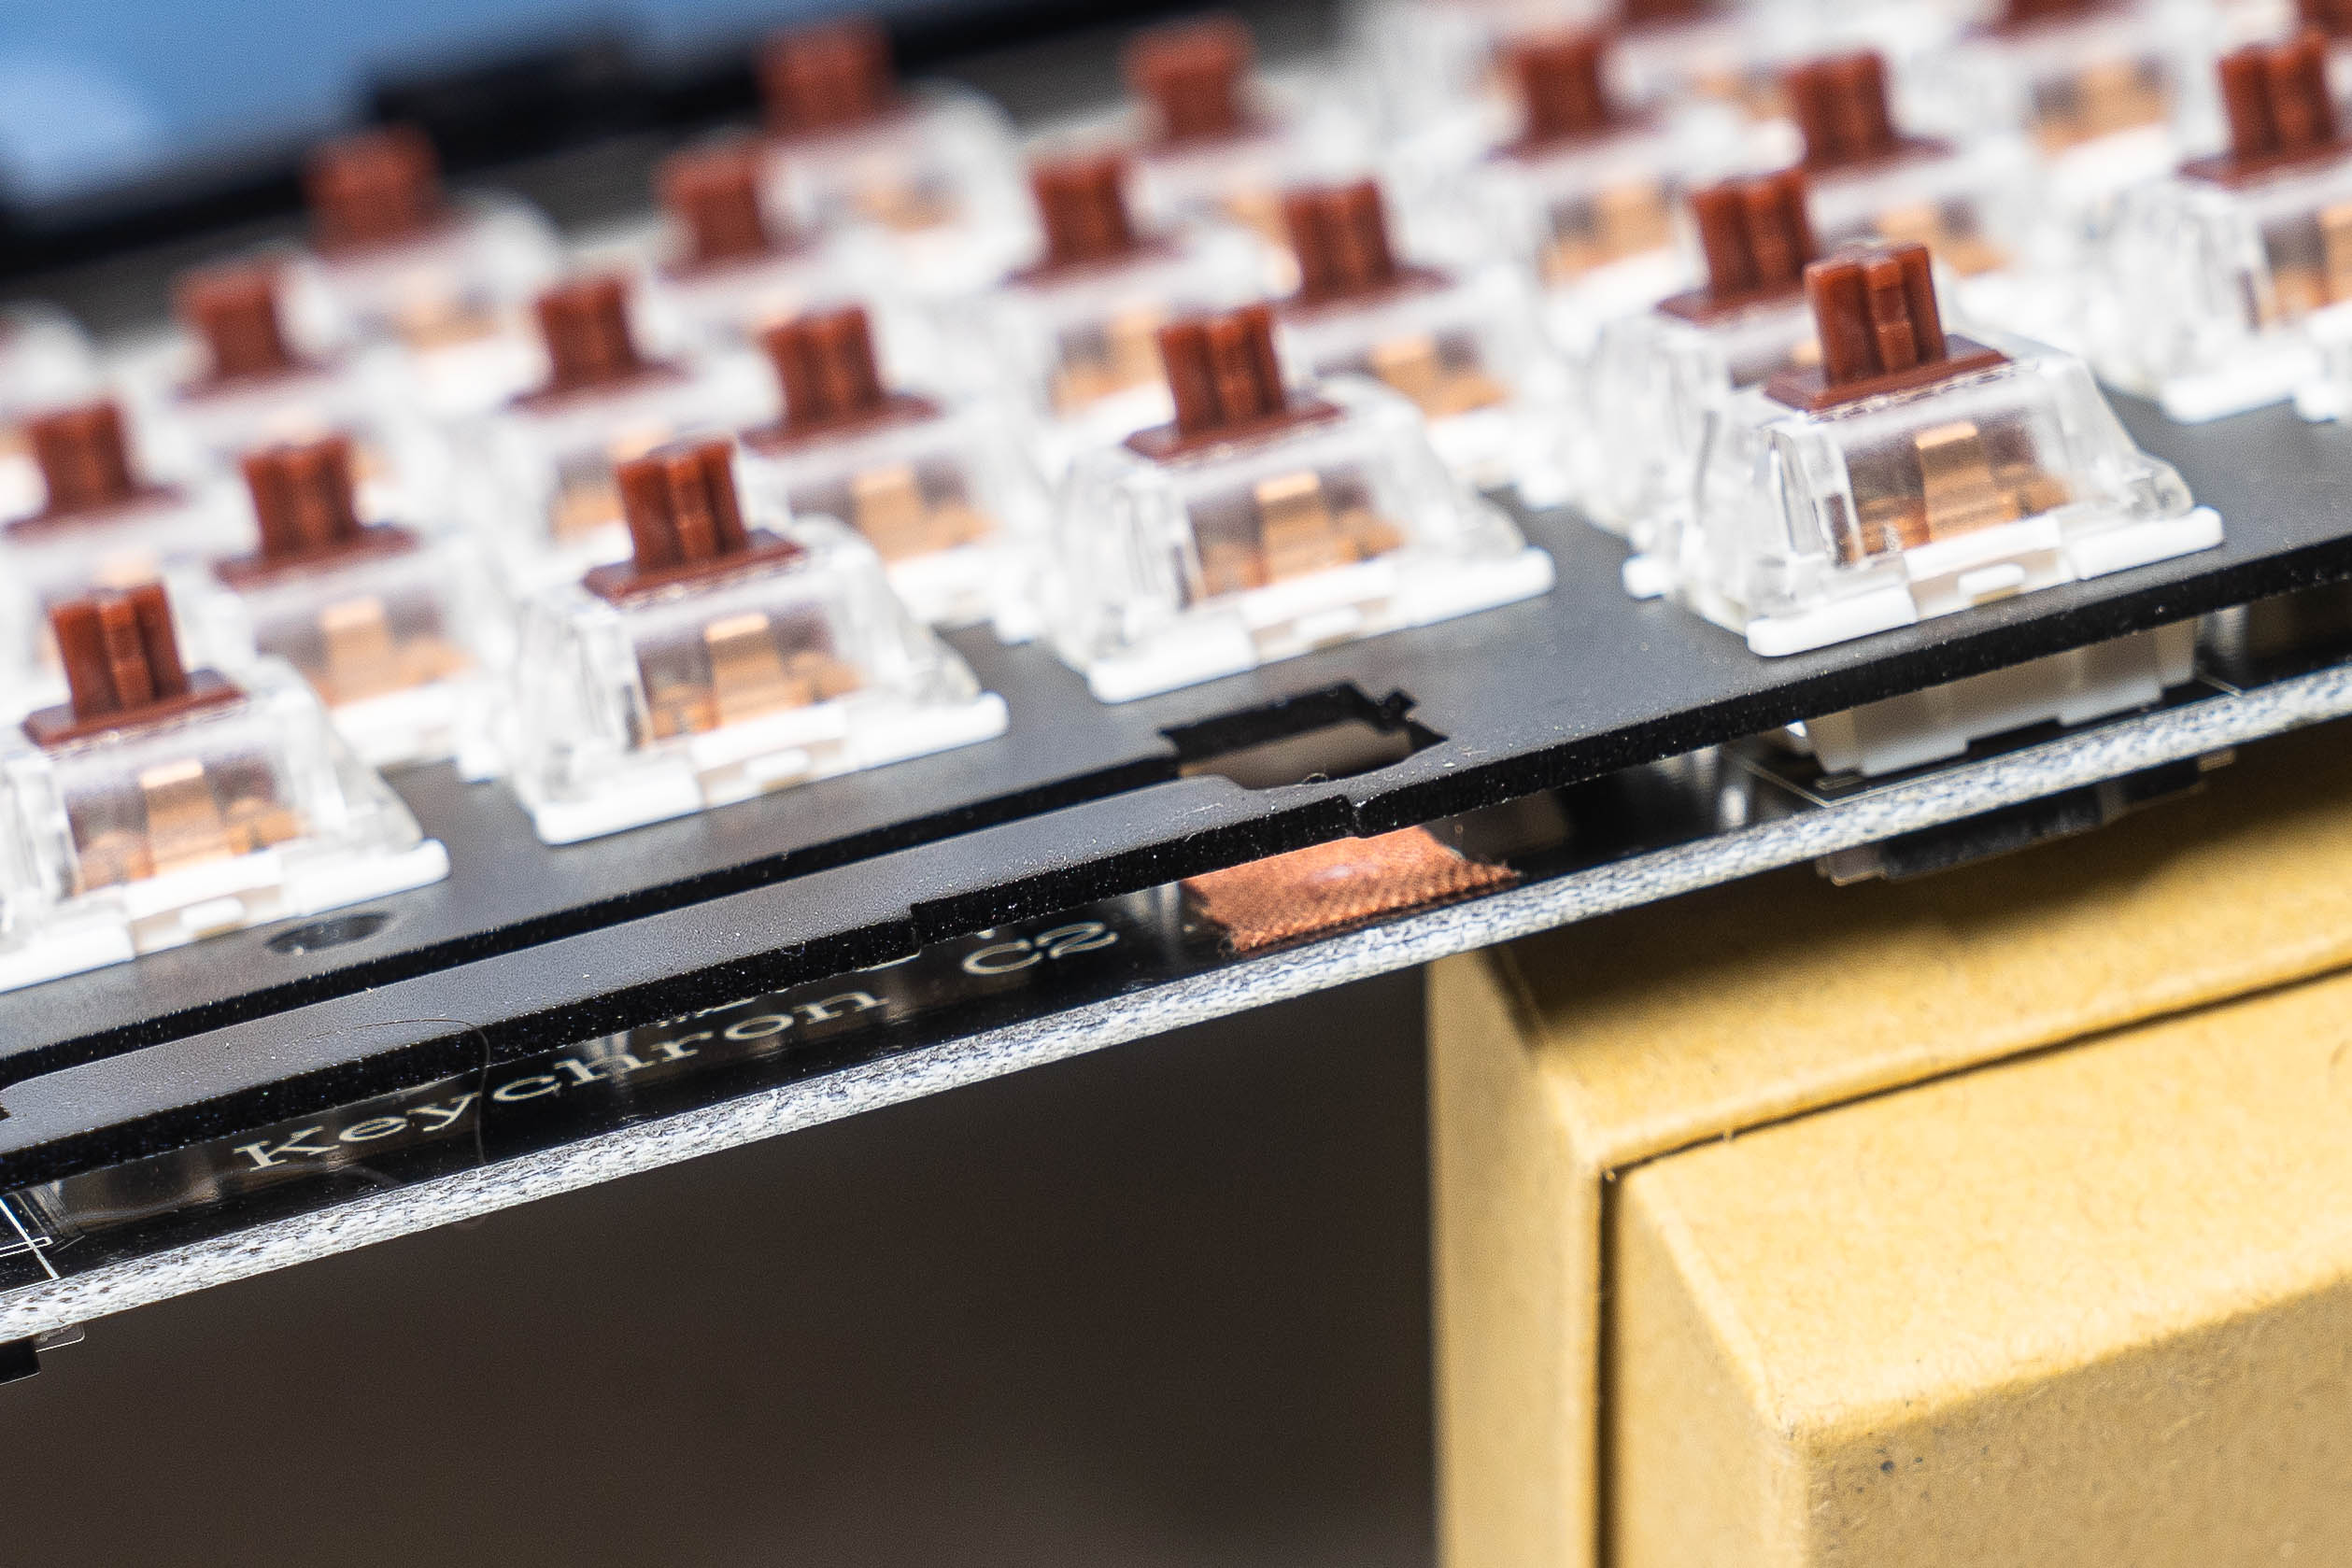
Next up, you’ll want to bandaid mod the PCB. I did this without removing the other switches. Here’s what that looks like:

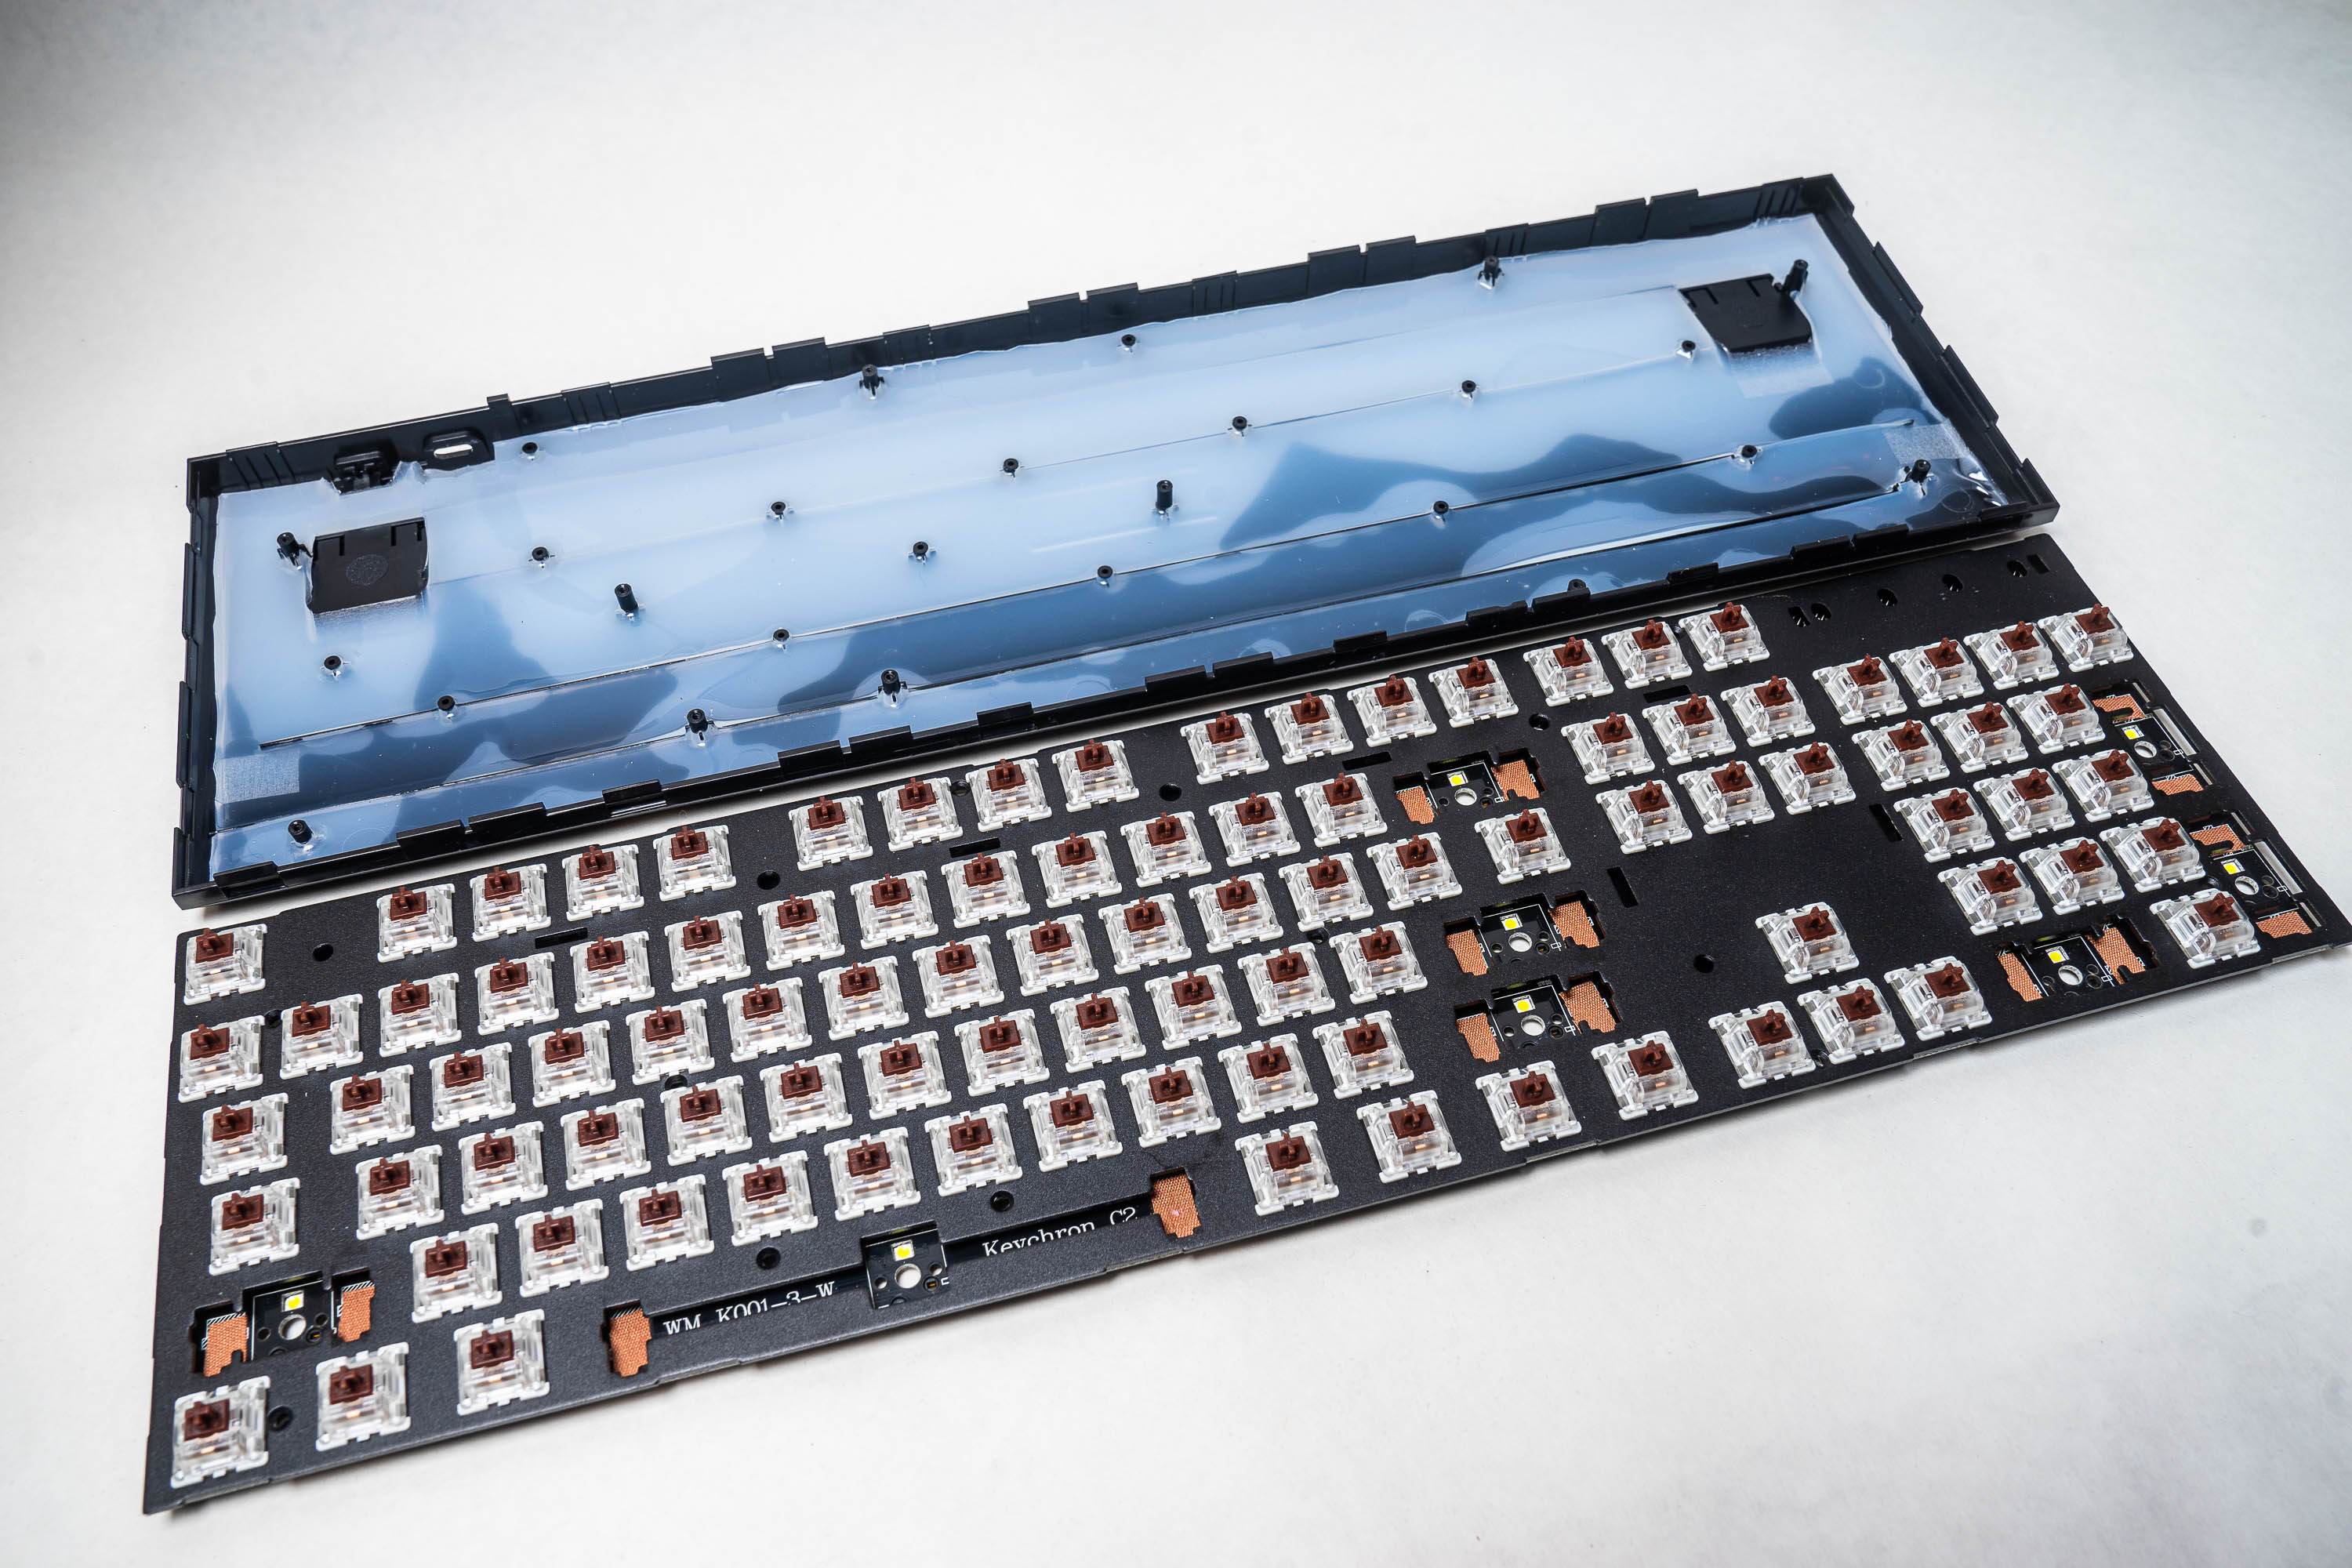
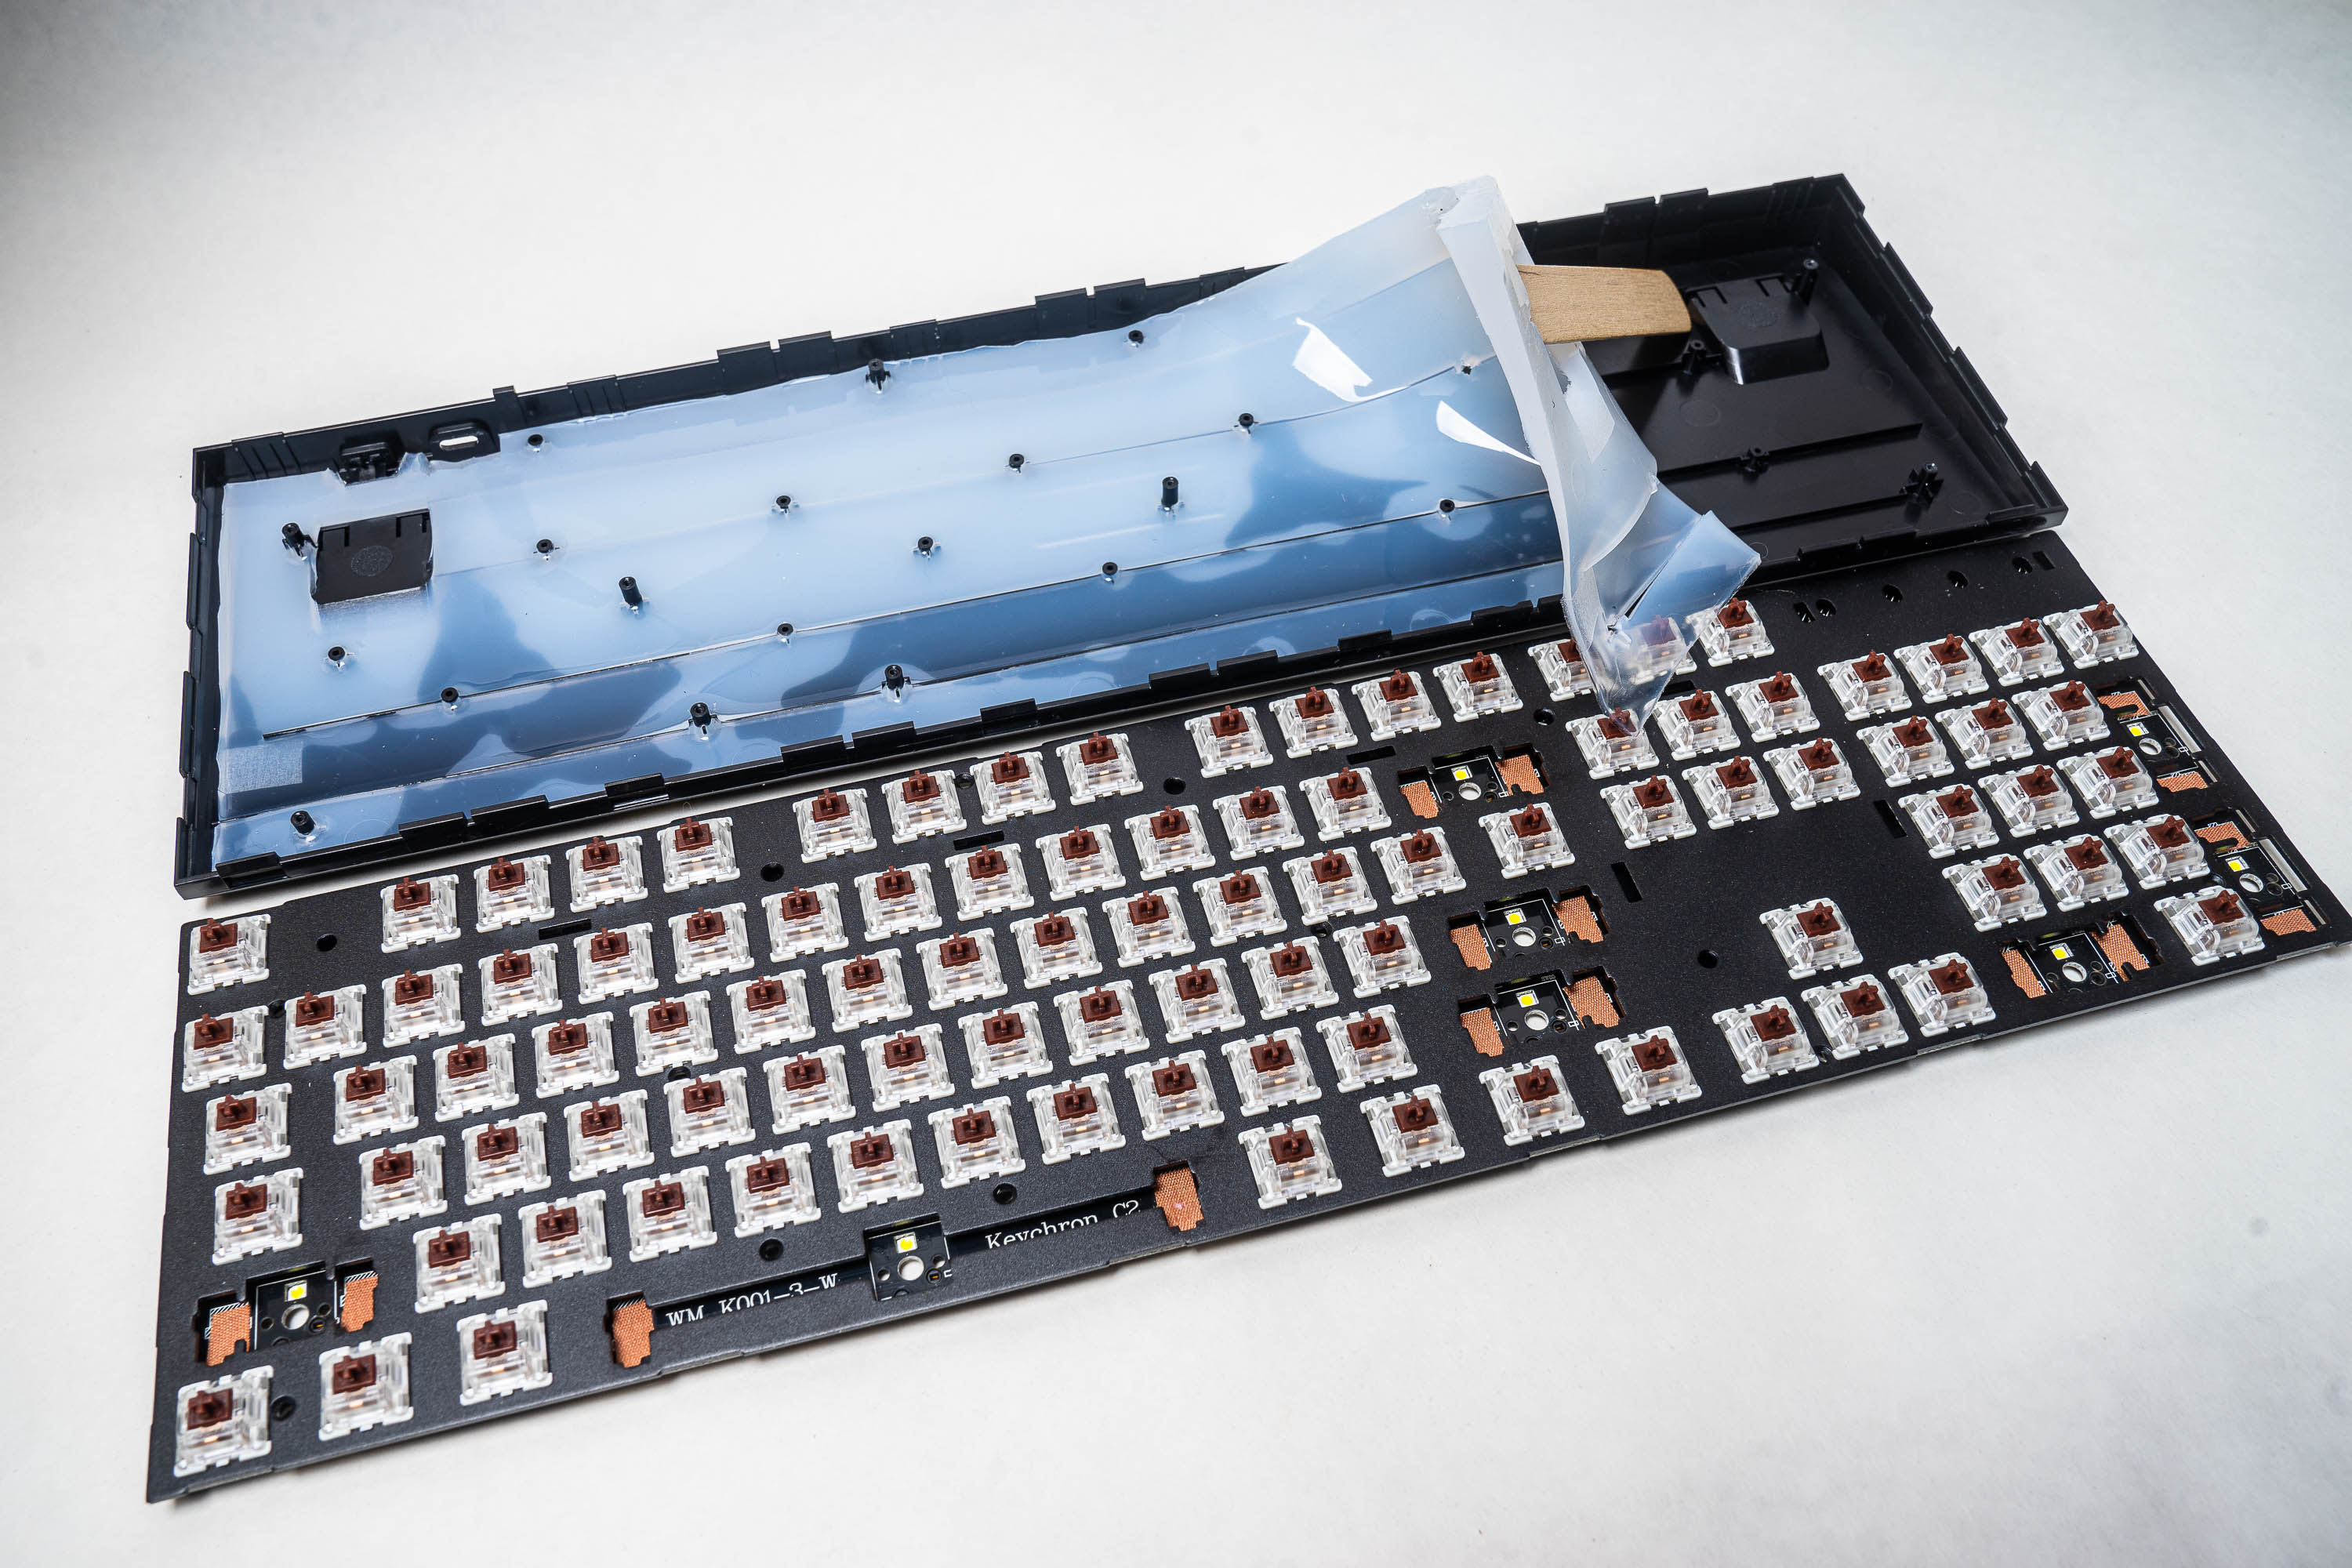
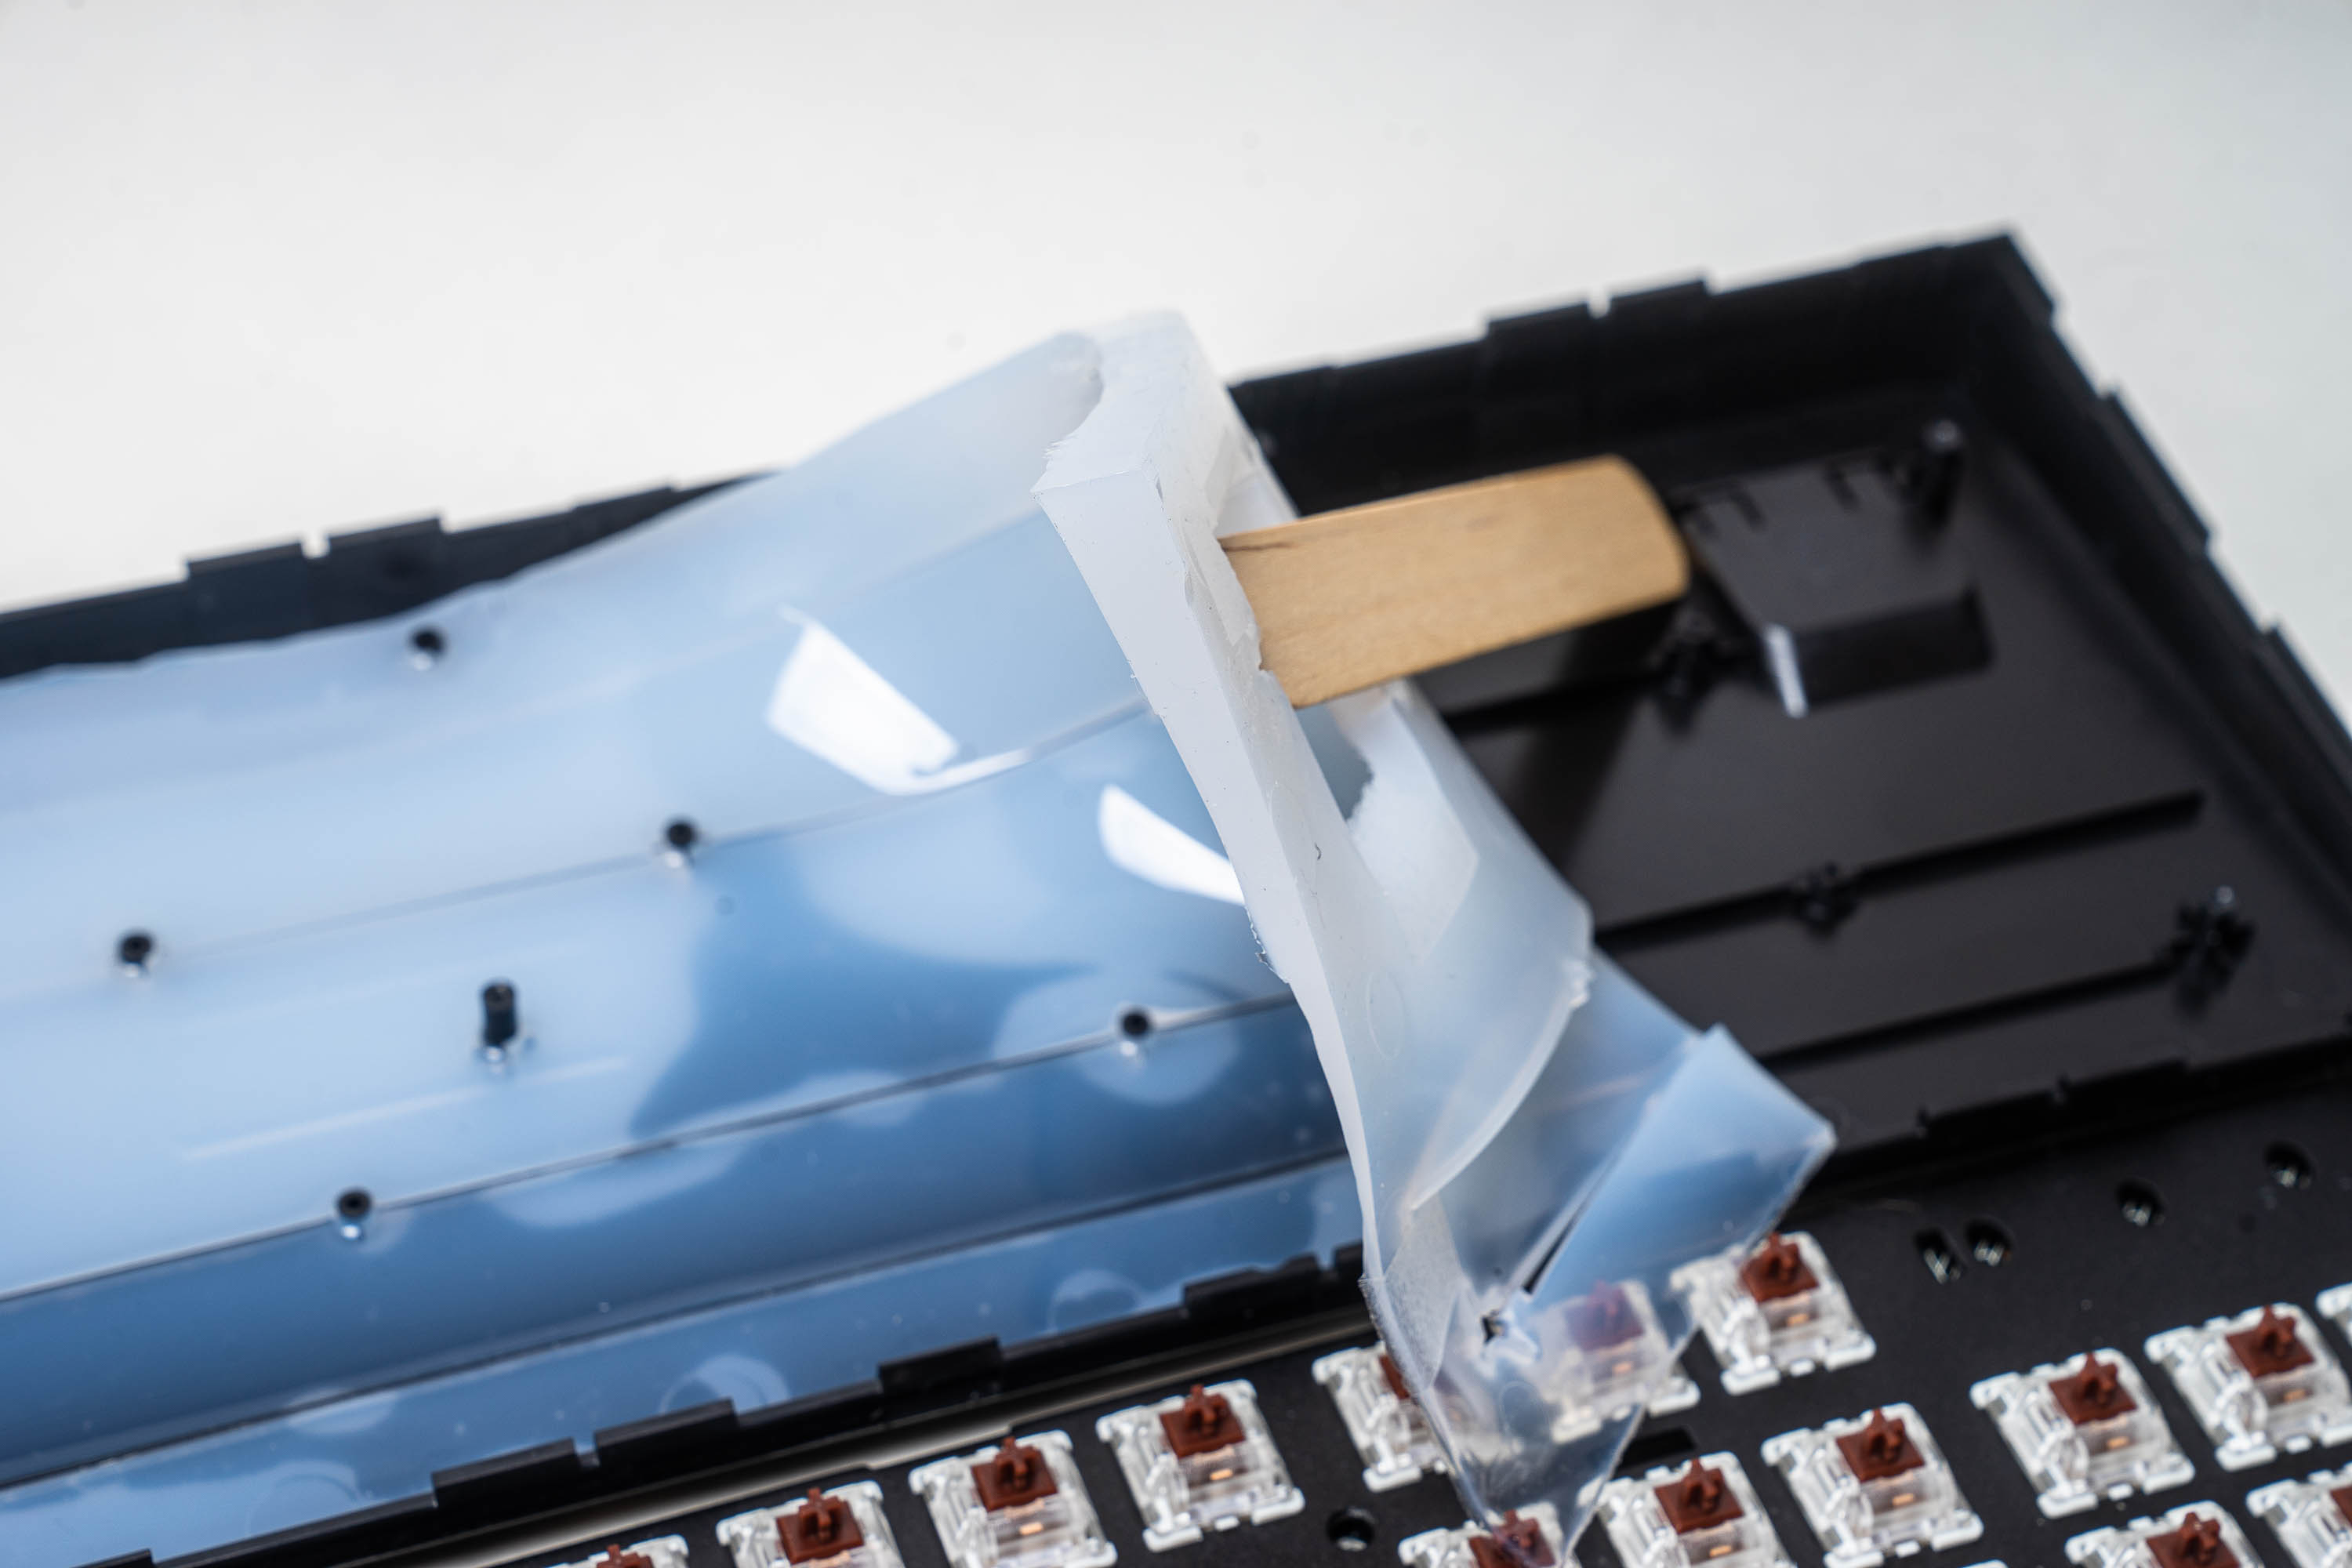
Finally, you will create the silicone dampener. Make sure you seal off any holes. I used painter’s tape, which worked fairly well. Here are some photos of the dampener once finished and installed:
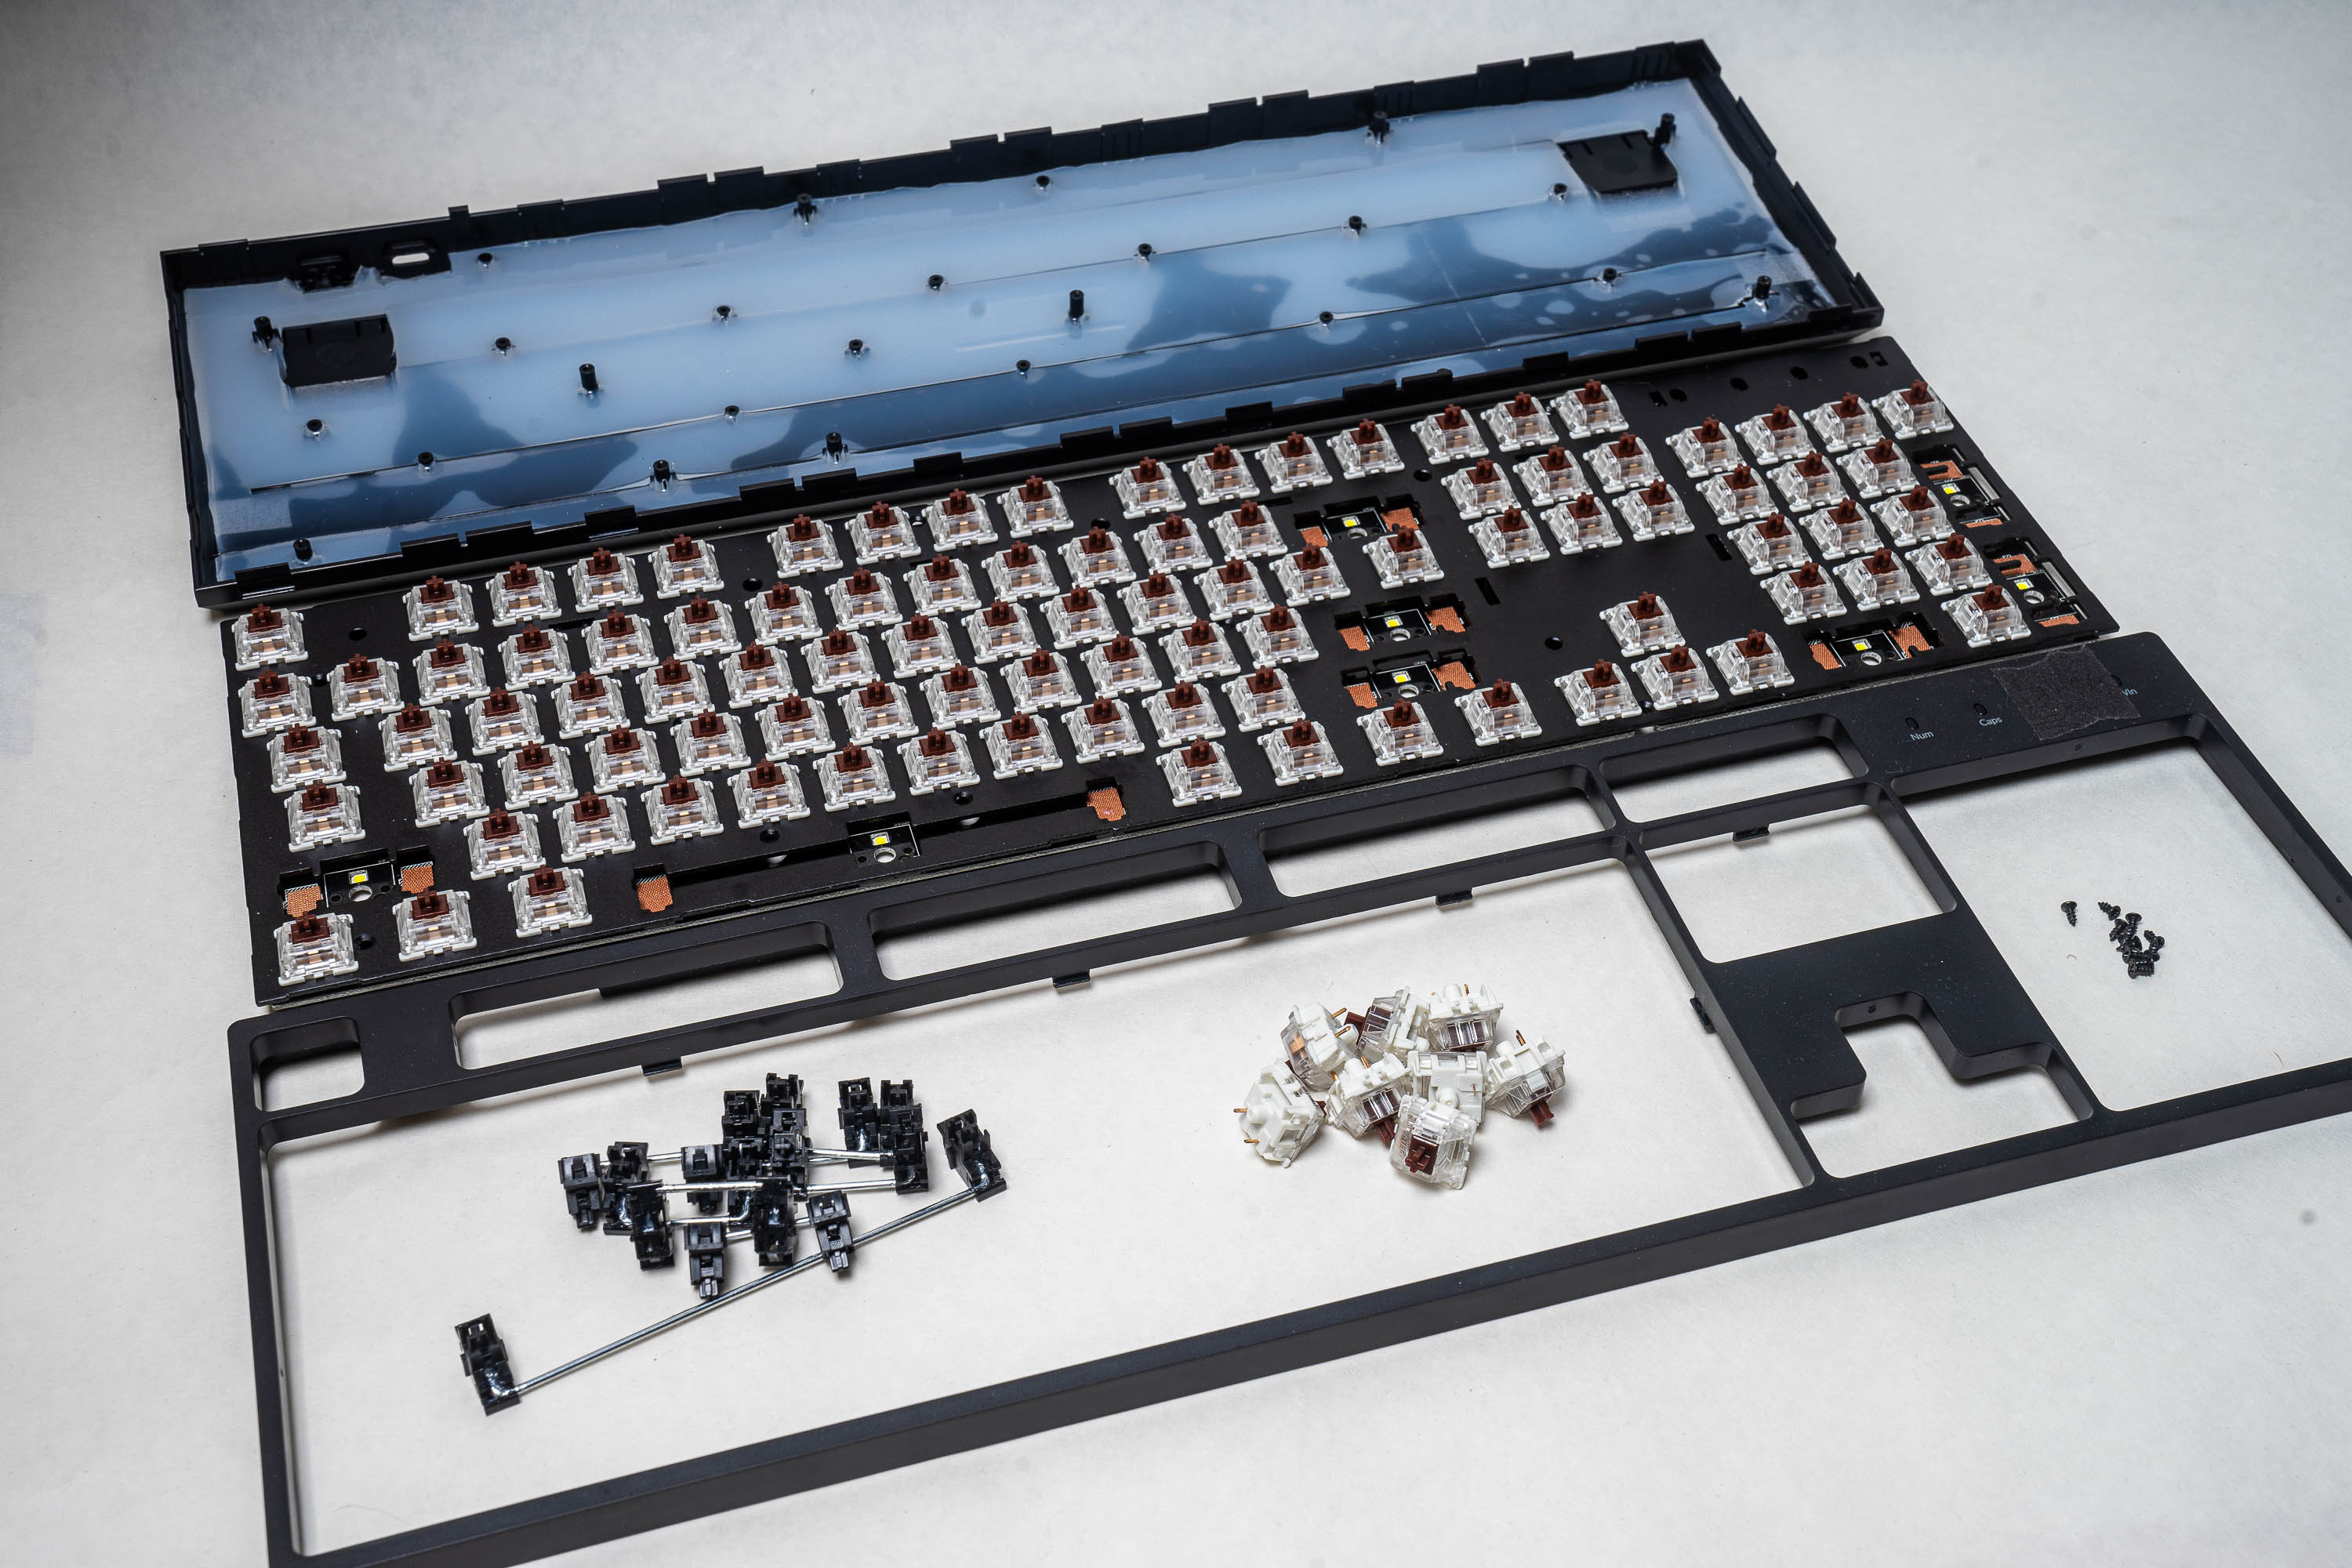
All together, this involves a small number of parts and is a great place for folks to start with modding. Here are all the pieces before putting the keyboard back together:
Final product
Below is a sound test video comparing the unmodified Keychron C2 with the modded one. Direct link to the video is here.