Using a mirrorless camera or DSLR for video conferencing
Tuesday, July 7, 2020
Click here to go to all posts. Also published on Medium
Photography has been a passion of mine for many years and I’ve begun dabbling in video over the last 18 months as well. Thus, it’s likely no surprise that one of my first reactions when starting to regularly work from home was “how can I use my existing gear for video conferencing?”
I am, by far, not the first person to do this, but I also approached it with a specific goal: I wanted any new camera gear or knowledge to be useful for more than video conferencing. To borrow language from the culinary world, I don’t recommend folks get “unitaskers” for video conferencing.
As a result, keep in mind your passions, budget, and work situation when reading this. Let’s get started!
Prerequisites
In general, you’ll need a set of gear that looks like this:
-
A supported camera with HDMI or SDI output (depends on your capture device)
-
Wall power adapter for your camera
-
A tripod or stable surface of some kind
- Video capture device that supports HDMI and/or SDI recording. Potential options (non-exhaustive):
- Blackmagic UltraStudio: Mini Recorder, Mini 4K, HD Mini, etc.
- Elgato: HD60 S, Cam Link, etc.
- Most PCIe capture cards
- Live streaming software like OBS
As I mentioned above, I already have a lot of camera gear that I’ve assembled over the last decade. For my setup, I’m using:
-
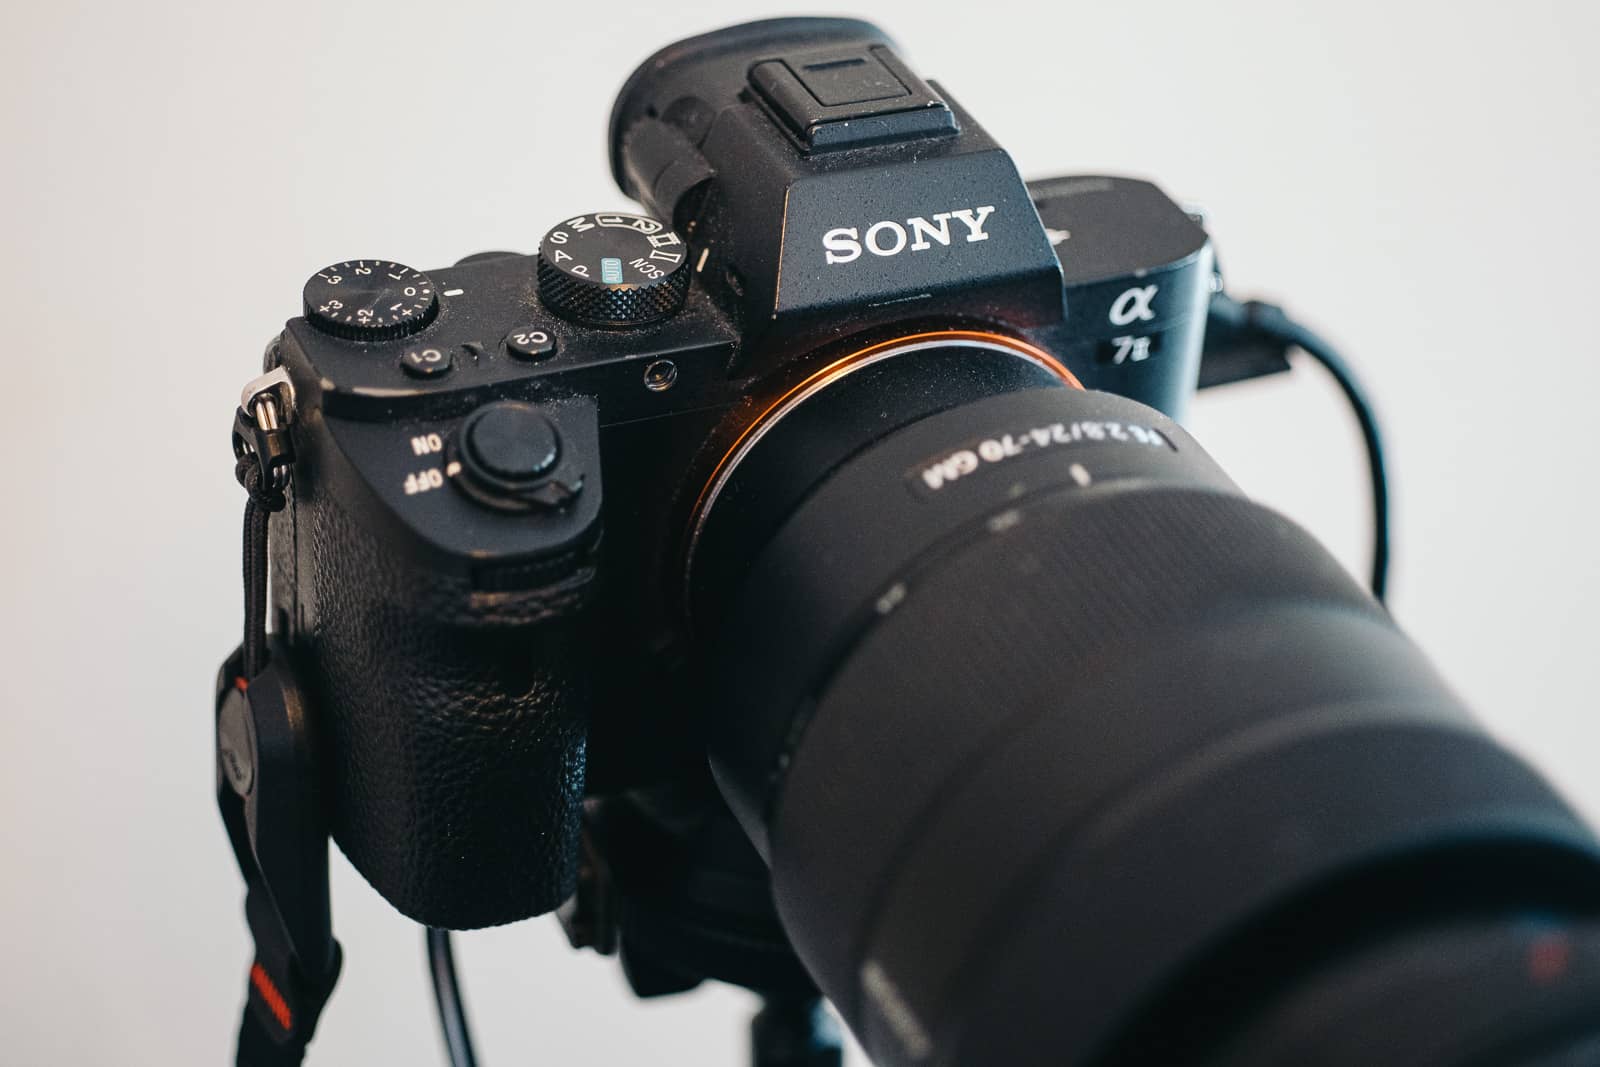
Sony A7II with various lenses
-
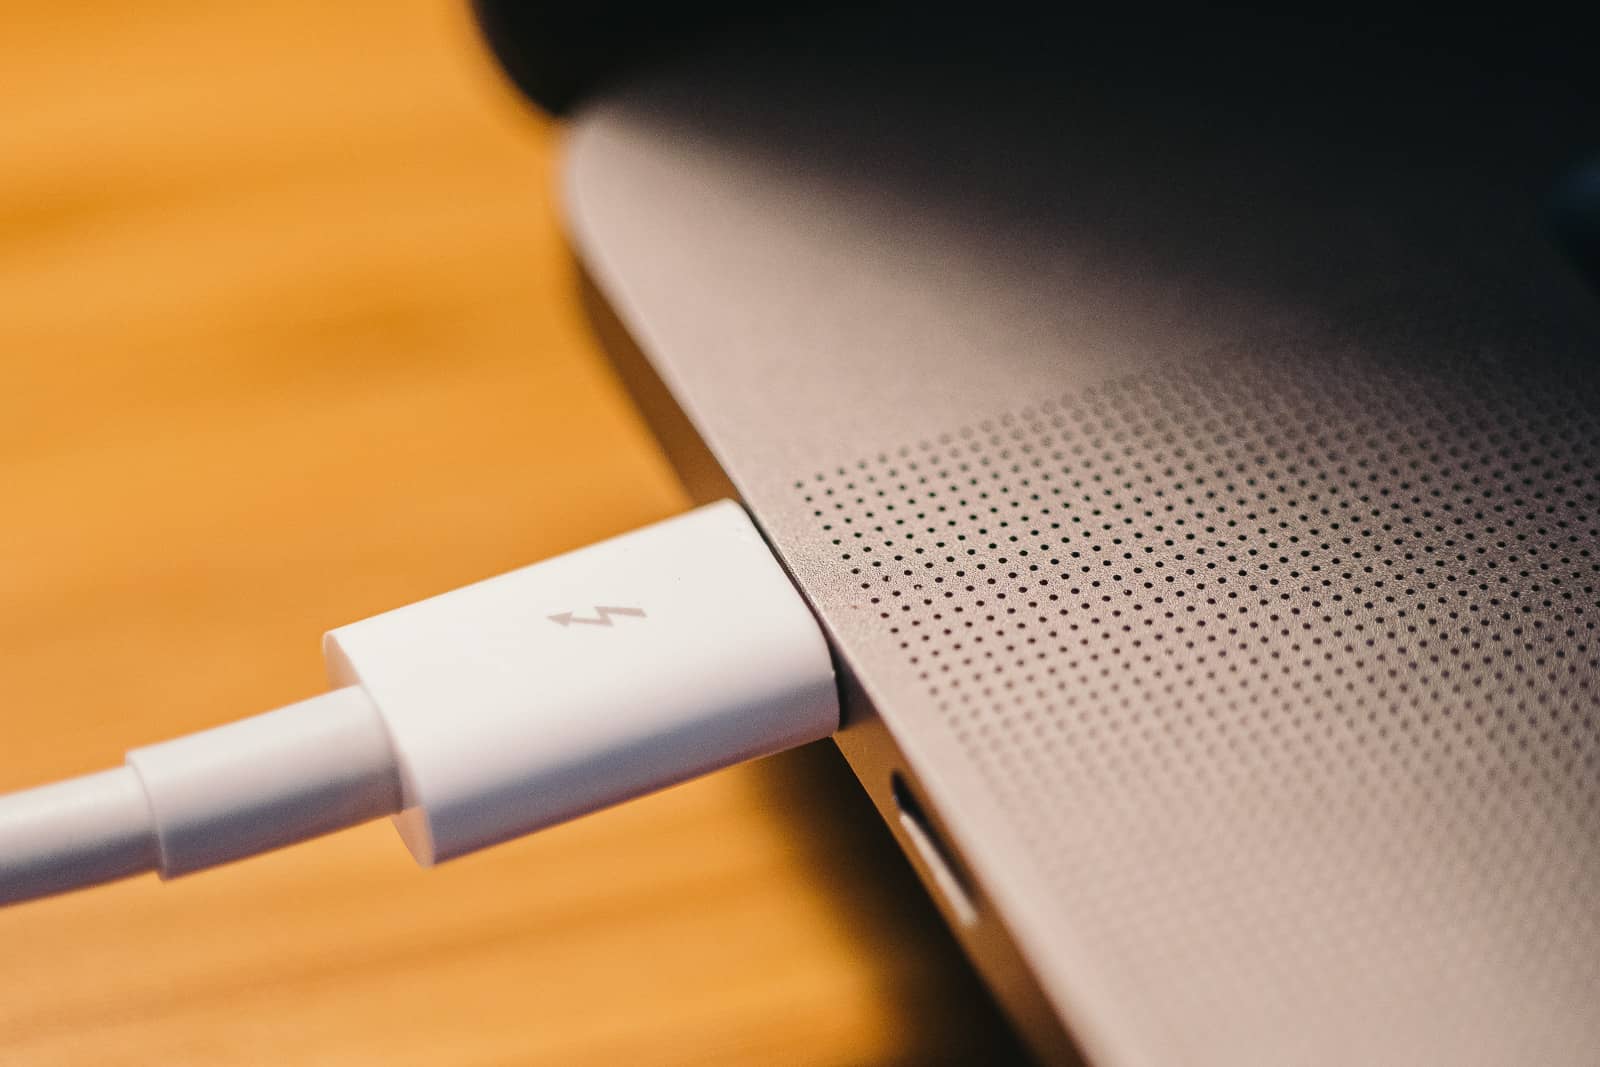
MacBook Pro (2019) with macOS v10.15.5
-
OBS v25.0.8 and obs-mac-virtualcam
-
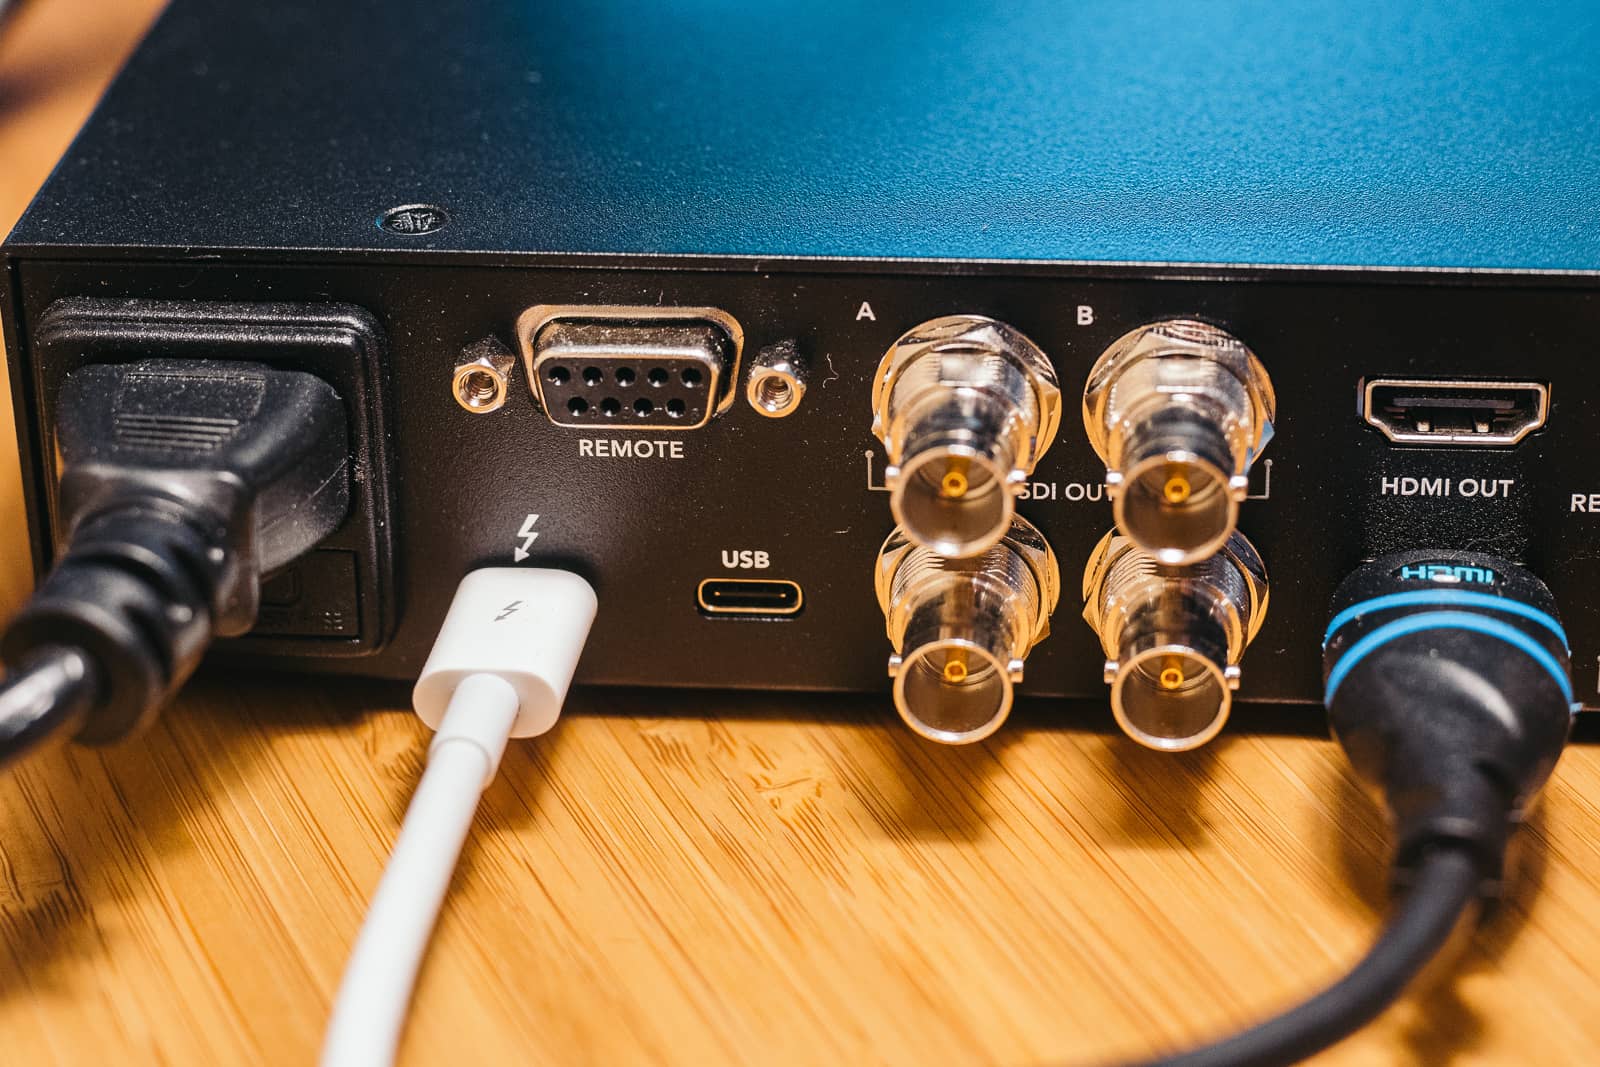
Blackmagic UltraStudio 4K Mini
-
All the necessary cables (Micro-HDMI-to-HDMI, Thunderbolt 3, power cables, etc.)
Some background: what is OBS?
For folks who already engage in live video streaming or production, you may be familiar with OBS (Open Broadcaster Software) and alternatives. For those who aren’t, here’s the top line from the OBS website:
Free and open source software for video recording and live streaming.
What does that ultimately mean? OBS is software that enables you to:
-
pull video and audio from various sources (capture devices, screen recording, video files, etc.),
-
visually arrange it and add filters for various effects (color changes, audio effects, picture-in-picture, etc),
-
and broadcast, record, and stream the video and audio to destinations like YouTube, Twitch, or video production setups.
That’s by no means an exhaustive list of what OBS can do, and I encourage you to try it out and see what creative ways it can work for you.
While it’s not the primary use case for OBS, by using a plugin for your specific operating system, you can output the OBS video as a “virtual webcam” for other software applications, such as Chrome, Zoom, Teams, etc.
Let’s take a look at the plugins next.
Virtual webcam from OBS
Why a “virtual webcam”? In short, video capture devices, such as Thunderbolt decks and PCIe capture cards, don’t provide the same kind of standardized webcam input that most applications expect. That’s why we’re using OBS, which does support these devices. But now we need to get that video output to appear like a webcam.
Depending on your operating system, you’ll need a different plugin to get OBS to do this.
Here are the plugins I’ve tried:
On an almost-daily basis, I’m using obs-mac-virtualcam on my MacBook Pro 16 (2019). I’ve also tested this configuration on a MacBook Pro 13 (2018) that only has an Intel GPU, so it should work fine without a dedicated GPU.
There are limitations to each of these plugins. For example, macOS has limitations that affect which applications can use the virtual webcam output (see the compatibility list).
Setting it all up
Let’s walk through how I have this working.
Hardware setup
Sony A7II powered via wall adapter and connected to the micro-HDMI end of the micro-HDMI-to-HDMI cable:
HDMI end of the micro-HDMI-to-HDMI cable, power cord, and Thunderbolt 3 cable plugged into the UltraStudio 4K Mini:
Thunderbolt 3 cable plugged into the MacBook Pro 16 (2019):
Software setup
In terms of software, I have OBS and obs-mac-virtualcam installed and running. Let’s take a look at how to configure OBS.
After you’ve installed OBS and your virtual webcam plugin, you can proceed to setup.
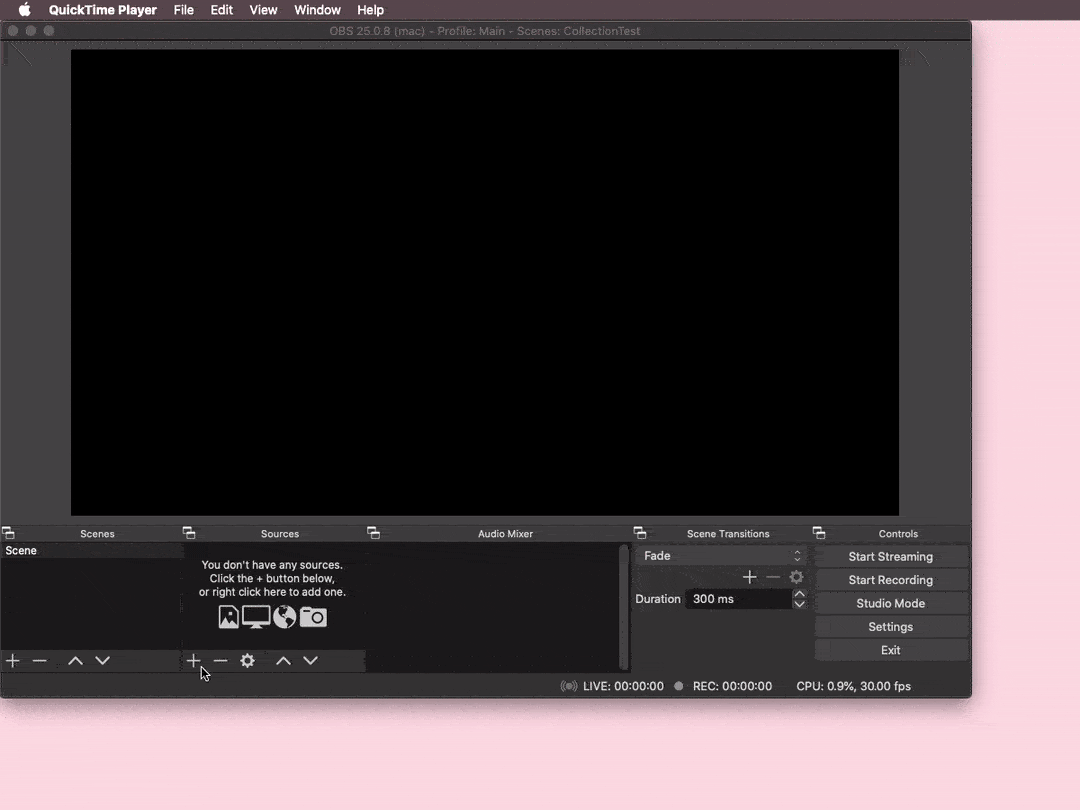
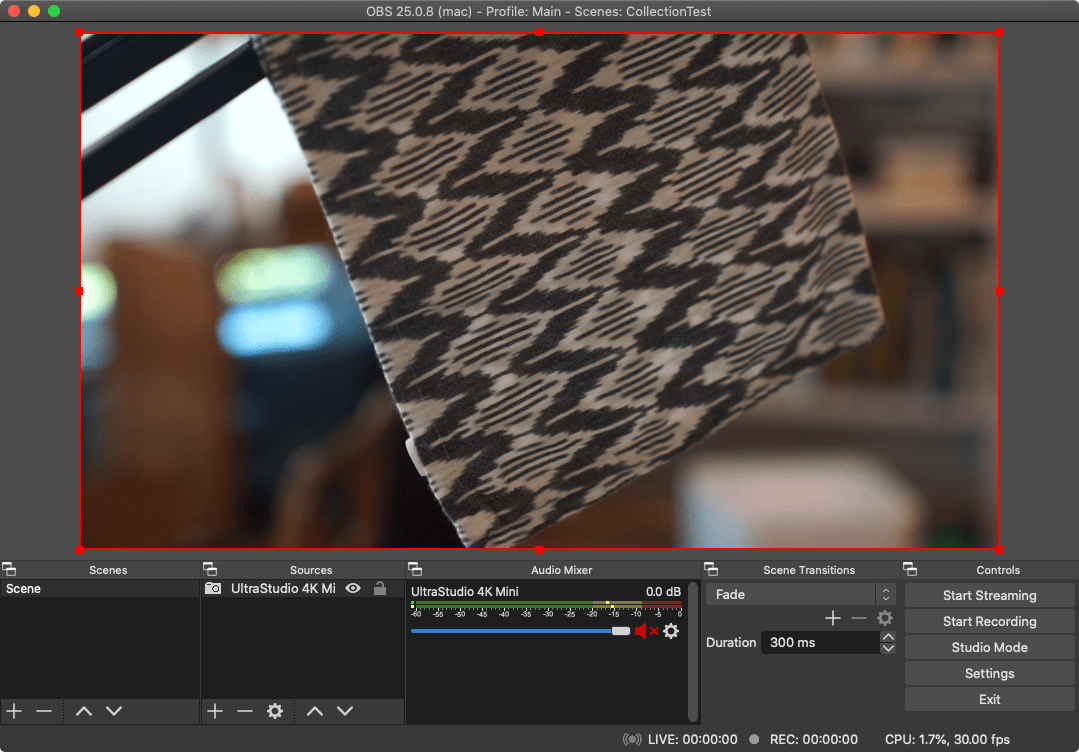
Let’s go step by step. First, you’ll open OBS to a screen that looks similar to this:
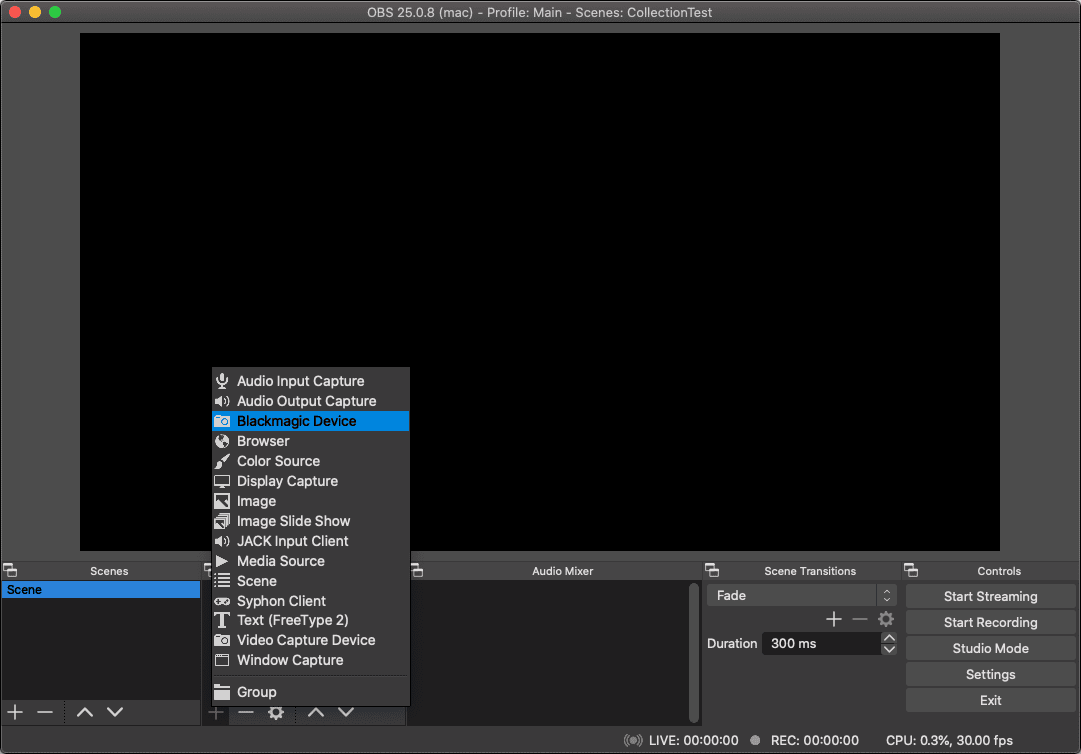
OBS already has an initial empty scene, so we’ll just add our capture device to that. If you’re using an UltraStudio like I am, you’ll get to select the “Blackmagic Device” option directly. Otherwise, pick the option for your capture device.
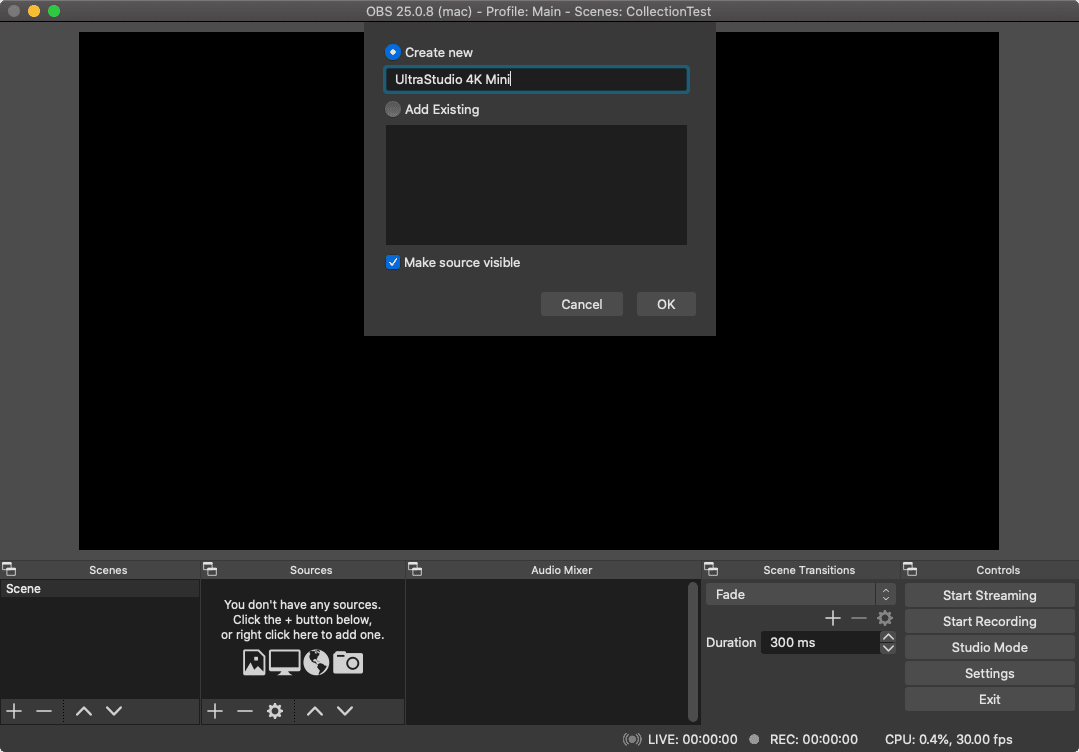
Naming this new source:
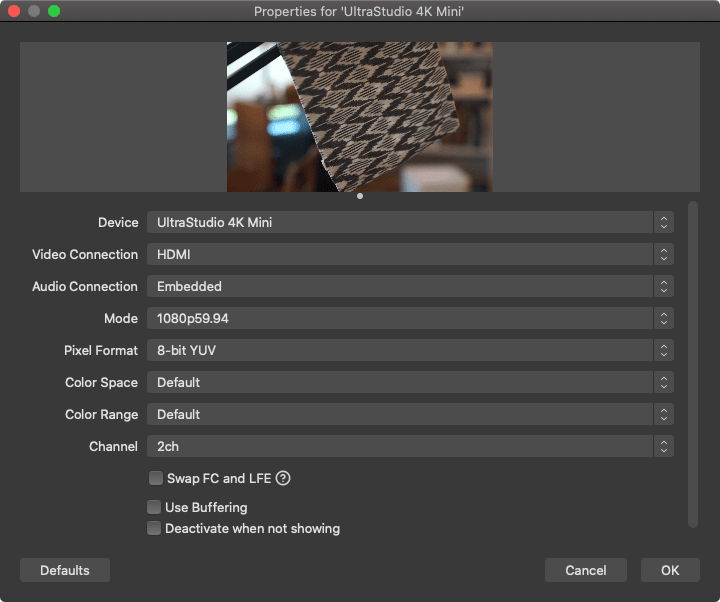
Configuring the source. In my case, I know that my Sony A7II outputs at 1080p59.94 over HDMI. You can also try Auto.
Depending on your OBS canvas size, you may need to resize the video:
What about audio?
Audio is another part of this setup. You’ll notice that in the screenshots, I’ve muted the OBS audio coming from the capture device.
You have many options here as well, but I recommended starting simple. I’ve been using a 3.5mm gaming headset with a built-in, flexible mic. This makes audio simple as you can select it as normal from your video conferencing application, instead of trying to set up OBS, audio monitoring, etc. for the first time.
Trying it out
Now we need to turn on our virtual webcam. Let’s take a look before and after.
Here’s Google Meet without virtual camera turned on:
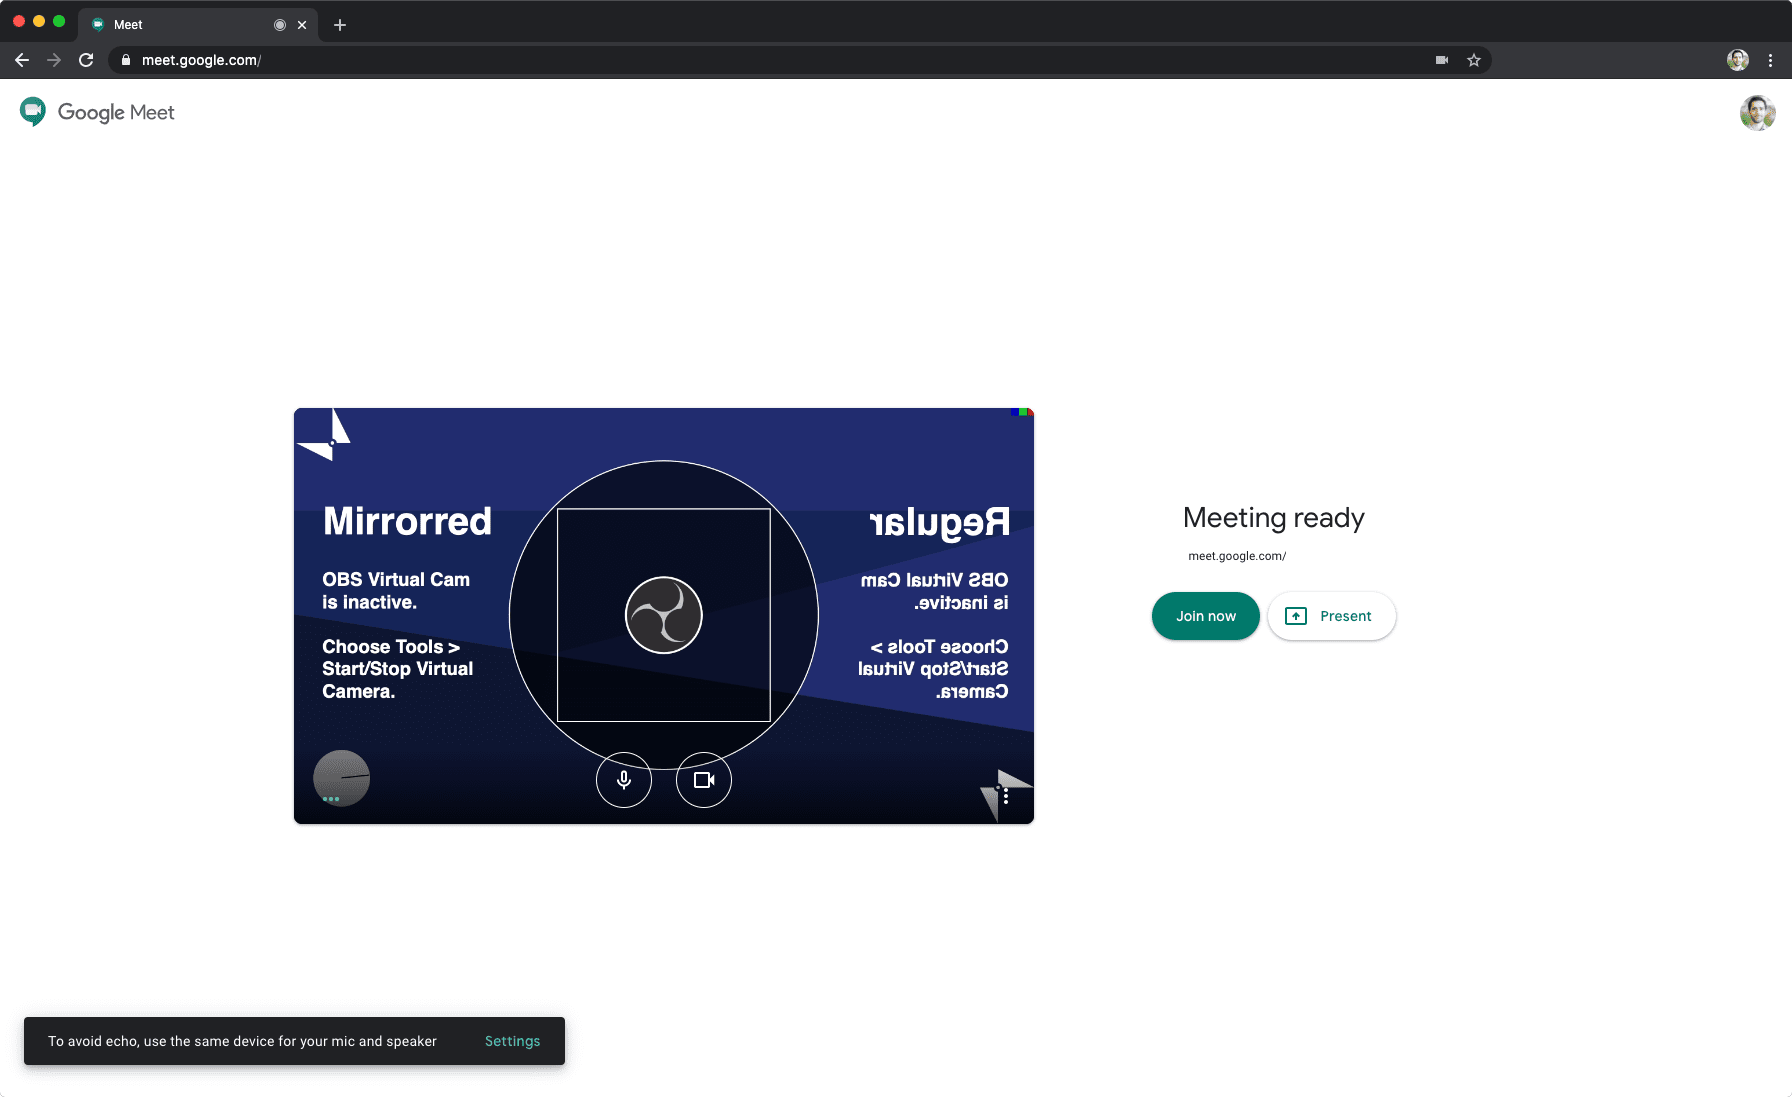
OBS provides a helpful test screen. Let’s turn on our virtual camera in OBS:

And now in Google Meet:
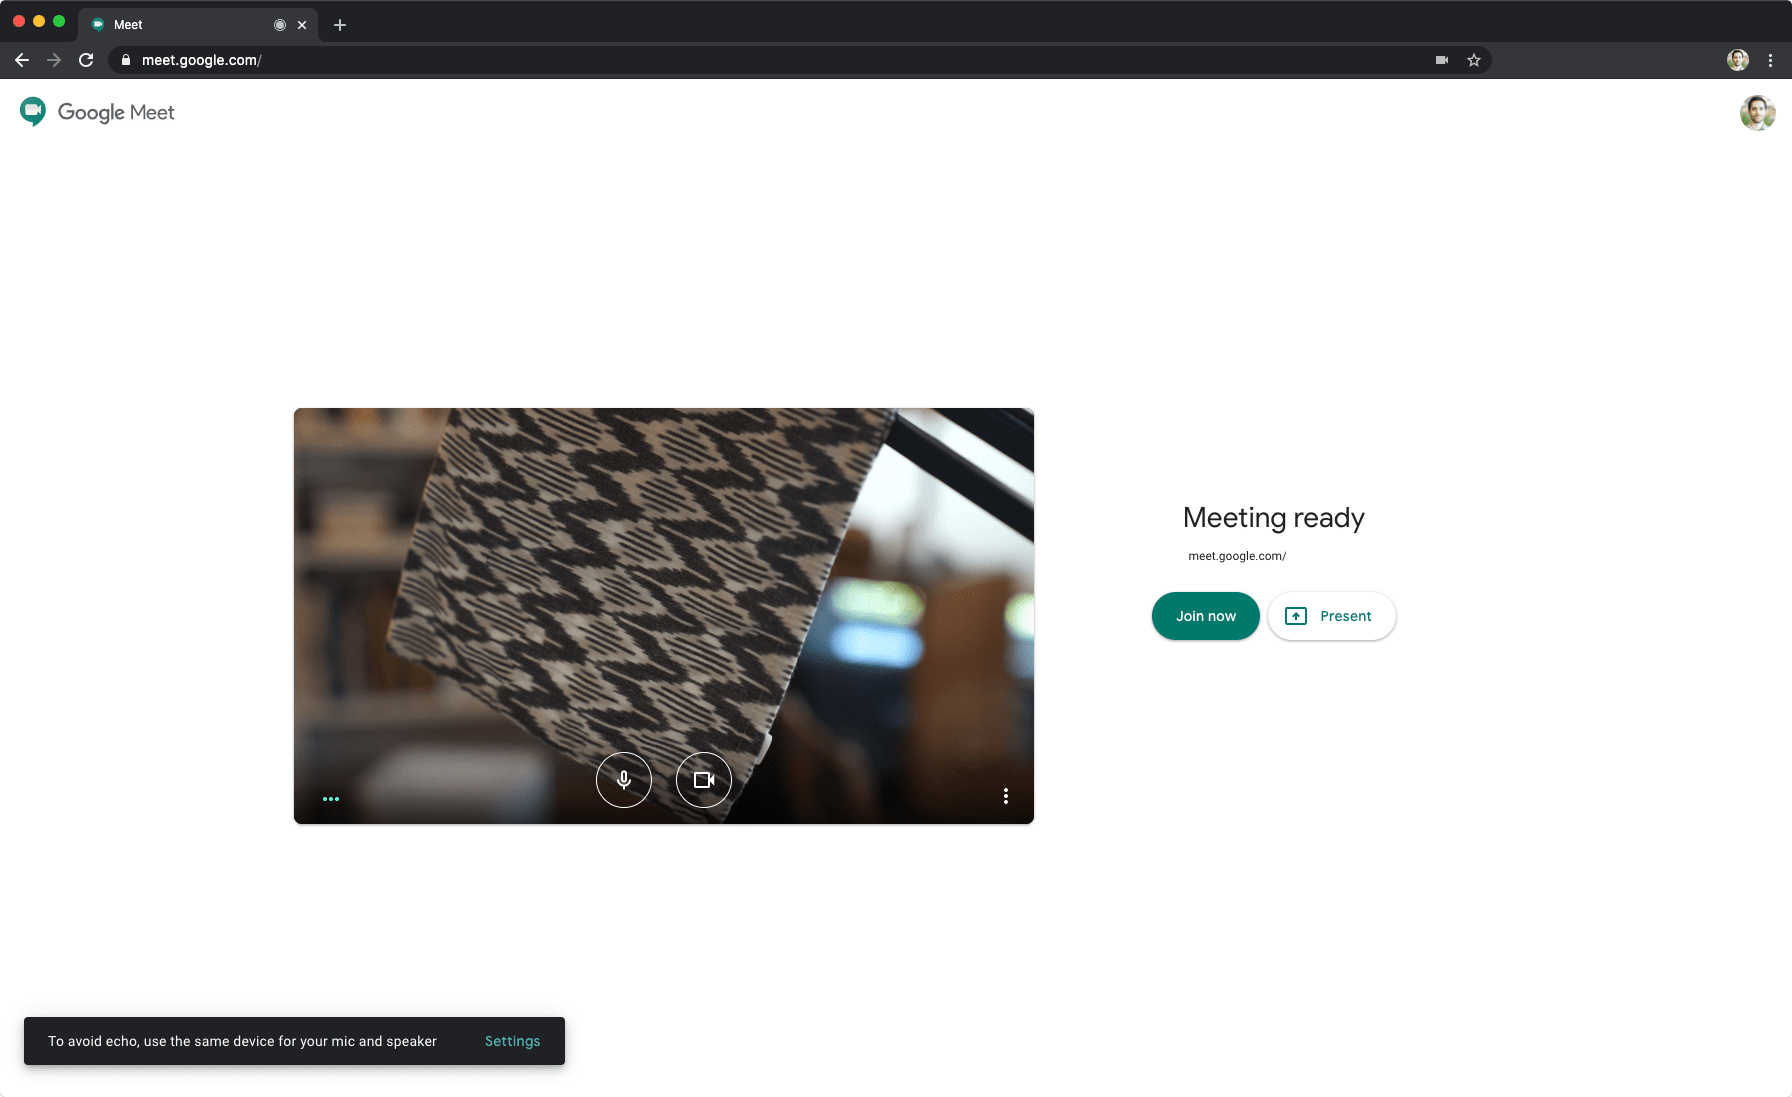
Looks like we’re good to go! What about other applications, such as Zoom?
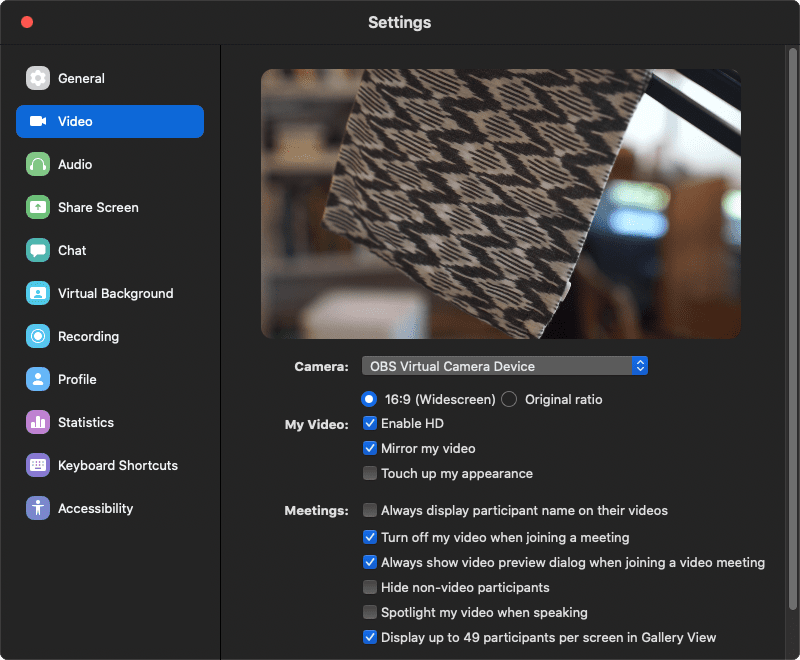
Looks like it’s working there too.
Wrapping up
This is just a small sample of what is possible using camera gear you may already have for video conferencing. While I still recommend 1080p USB webcams for the majority of folks, this presents an interesting option if you are already doing some video work.
Does it make a difference? I’ve had a high number of folks in video calls notice the difference. As an example:

That being said, always balance what you’re looking to accomplish with your budget, your passions, and the amount of work you want to put in. While you can spend hundreds of thousands of dollars on a video calling setup, that doesn’t always mean you should!
If you liked this post, let me know, and share with others!
If you’re interested in reaching out, check my website, LinkedIn, GitHub, and many other platforms.